


Keybindings let you control Claude Code without leaving the keyboard. Every interrupt, every mode switch, every model swap, and every transcript toggle lives behind a shortcut you can rebind. This guide covers the full keybindings system, from the JSON config file to every default shortcut, the binding contexts, vim mode, and the status line that ties it all together. You will learn how to read, write, and customize keybindings so your terminal workflow feels fast and predictable.

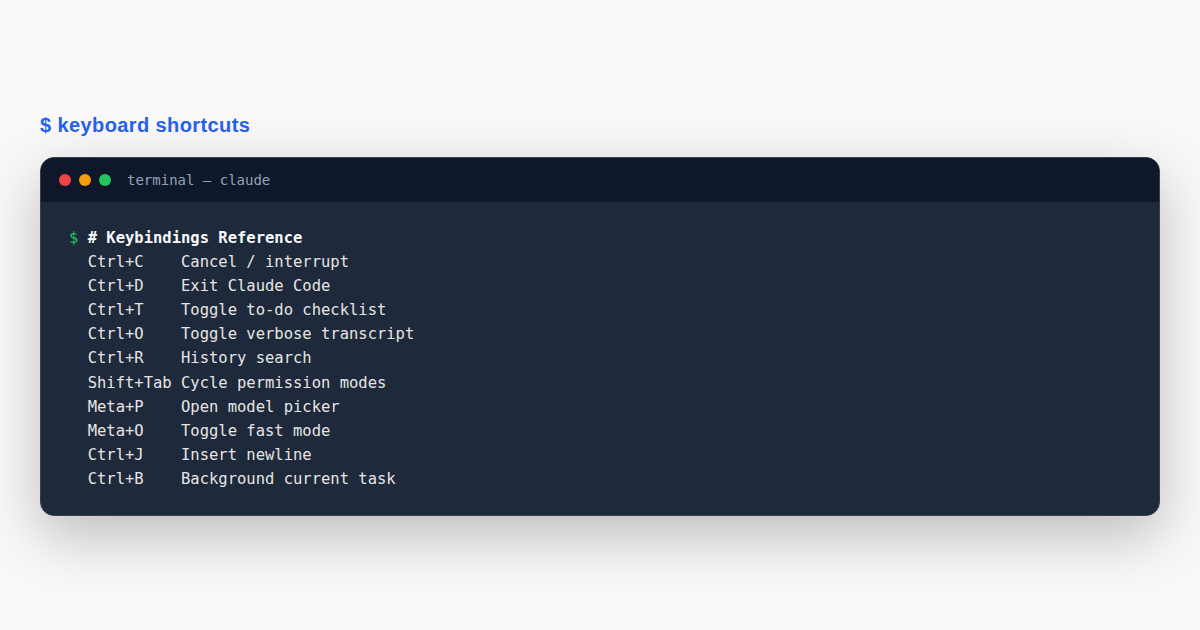
Keybindings: What You’ll Learn
Keybindings are the backbone of a fast Claude Code session. Once you understand the keybindings file and the contexts that govern them, you can rewire the entire interface to match your muscle memory. This guide walks through the config format, the default shortcuts across all contexts, the keystroke syntax for writing your own, vim mode integration, and the status line you can build alongside your keybindings to monitor context and cost.
The keybindings.json Configuration File
Claude Code stores your custom keybindings in a JSON file at ~/.claude/keybindings.json. The keybindings file holds a top-level object with three fields: an optional $schema for editor autocompletion, an optional $docs link, and a required bindings array. Each entry in that array is a block that groups a context name with a map of keystroke to action pairs, and every keybindings block follows the same shape.
The structure is flat and readable. You never nest contexts inside each other. Instead, you list one block per context, and each block carries its own bindings object. Claude Code reads every keybindings block, merges them with its built-in defaults, and applies the result live.
{
  "$schema": "https://www.schemastore.org/claude-code-keybindings.json",
  "$docs": "https://code.claude.com/docs/en/keybindings",
  "bindings": [
    {
      "context": "Chat",
      "bindings": {
        "ctrl+e": "chat:externalEditor",
        "ctrl+u": null
      }
    }
  ]
}
Notice how "ctrl+u": null removes a default shortcut instead of adding one. Setting an action to null unbinds the keystroke so it no longer fires. You will see that pattern throughout this guide because unbinding is how you reclaim keys that conflict with your terminal or your habits.
The $schema field is worth keeping. When you open the file in an editor like VS Code, the schema provides autocomplete suggestions for context names, action names, and keystroke syntax. That catches typos before Claude Code even loads the file.
The /keybindings Command and Live Reload
You do not need to hunt for the config file manually. Run the /keybindings slash command inside Claude Code, and it creates or opens ~/.claude/keybindings.json for you. If the keybindings file does not exist yet, the command scaffolds a starting template with the schema reference already in place.
The live reload behavior is what makes keybindings pleasant to work with. When you save the keybindings file, Claude Code detects the change and applies your new bindings immediately. No restart, no reload command, no session restart. You can switch to your editor, tweak a keybindings entry, save, switch back, and the new binding is active on your next keystroke.
Claude Code also validates the keybindings file on load. If you mistype a context name, bind a reserved shortcut, or create a duplicate within the same context, you get a warning. Run Claude Code with the --debug flag to see detailed keybindings validation messages in the debug log, which helps when a binding silently refuses to work.
Binding Contexts Explained
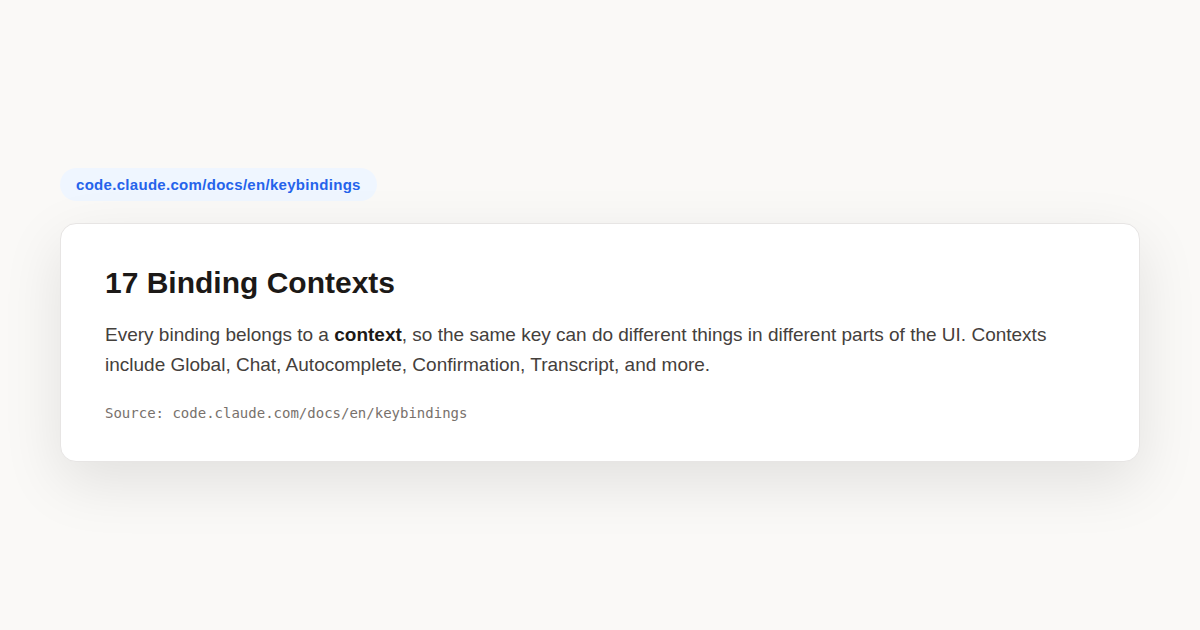
Every keybinding belongs to a context. A context is the part of the interface where the keybindings binding is active. The Global context applies everywhere, while narrower contexts like Chat, Autocomplete, or Confirmation only fire when that specific UI element has focus. This separation prevents collisions and lets the same key do different things in different screens.
Claude Code defines a rich set of contexts. Understanding them is the first step to writing keybindings that actually trigger when you expect. Here is the full list:
- Global. Applies everywhere in the app. Actions like interrupt and exit live here.
- Chat. The main chat input area where you type prompts and commands.
- Autocomplete. Active when the autocomplete suggestion menu is open.
- Settings. The settings menu panel.
- Confirmation. Permission prompts and confirmation dialogs.
- Tabs. Tab navigation components.
- Help. Active when the help menu is visible.
- Transcript. The verbose transcript viewer.
- HistorySearch. The reverse history search mode triggered by Ctrl+R.
- Task. Active when a background task is running.
- ThemePicker. The theme selection dialog.
- Attachments. Image attachment navigation in select dialogs.
- Footer. Footer indicator navigation for tasks, teams, and diffs.
- MessageSelector. The rewind and summarize message selection list.
- DiffDialog. The diff viewer navigation.
- ModelPicker. The model effort level picker.
- Select. Generic select and list components.
- Plugin. The plugin dialog for browsing, discovering, and managing plugins.
- Scroll. Conversation scrolling and text selection in fullscreen mode.
That is the complete context map. When a keybindings binding does not fire, the first thing to check is whether you placed it in the right context. A Chat binding will not trigger inside the Confirmation dialog, and vice versa, even if the keystroke is identical across your keybindings.
Global Actions and App Shortcuts
The Global context holds the shortcuts you use most often. These fire regardless of what screen is active. The interrupt shortcut, the exit shortcut, the todo toggle, and the transcript toggle all live here because they make sense everywhere in your keybindings.
app:interrupt is bound to Ctrl+C by default. It cancels whatever Claude Code is currently doing, whether that is generating a response, running a tool, or waiting on a permission. This is one of the reserved shortcuts, so you cannot rebind it.
app:exit is bound to Ctrl+D and closes Claude Code entirely. Like Ctrl+C, it is hardcoded and cannot be reassigned. app:toggleTodos sits on Ctrl+T and shows or hides the built-in to-do checklist that tracks Claude’s progress through a task.
app:toggleTranscript lives on Ctrl+O and toggles the verbose transcript view. The transcript shows the full reasoning and tool calls behind each response, which is useful for debugging or understanding what Claude actually did. There is also app:redraw, which forces a terminal redraw but ships unbound by default.
Chat Actions and Text Editing
The Chat context is where you spend most of your time. It governs the main input area, and its keybindings cover submitting messages, inserting newlines, switching modes, opening editors, and managing your prompt. These are the keybindings worth memorizing first.
chat:submit is Enter. chat:newline is Ctrl+J, which lets you add a line break without sending the message. chat:cycleMode sits on Shift+Tab and cycles through permission modes, letting you move between default, auto-accept, and plan modes without touching a menu.
chat:modelPicker is Meta+P and opens the model picker so you can switch models mid-session. chat:fastMode on Meta+O toggles fast mode. chat:thinkingToggle on Meta+T flips extended thinking on or off. These three Meta shortcuts give you quick control over how Claude reasons and responds.
chat:externalEditor is bound to both Ctrl+G and the chord Ctrl+X Ctrl+E. It opens your current prompt in whatever editor your EDITOR environment variable points to, which is handy for writing long prompts. chat:stash on Ctrl+S saves your current prompt so you can retrieve it later.
chat:clearInput is Ctrl+L and forces a full screen redraw while preserving your input. chat:cancel is Escape and cancels the current input. chat:undo maps to Ctrl+underscore and Ctrl+Shift+minus. chat:killAgents uses the chord Ctrl+X Ctrl+K and stops all running background subagents in the session.
chat:imagePaste is Ctrl+V on macOS and Linux, and Alt+V on Windows and WSL. On WSL specifically, both shortcuts are bound by default so paste works regardless of how the terminal reports modifier keys.
Readline Text Editing Shortcuts
Beyond the named chat actions, Claude Code respects standard readline editing shortcuts inside the input line. These come from the GNU readline library that powers most Unix shells, and they work at the text input level rather than through the keybindings JSON. Knowing which level handles each key helps you debug conflicts between readline and your keybindings.
- Ctrl+A. Move the cursor to the beginning of the line.
- Ctrl+E. Move the cursor to the end of the line.
- Ctrl+K. Delete from the cursor to the end of the line (forward kill).
- Ctrl+U. Delete from the cursor to the beginning of the line (backward kill).
- Ctrl+W. Delete the word before the cursor.
- Ctrl+Y. Yank, or paste, the most recently killed text back at the cursor.
One catch: Ctrl+U also appears in the default keybindings as a shortcut you might want to unbind. If a readline binding and a named action conflict, you can set the action to null in your keybindings file to free the key for its readline behavior. This is a common reason developers unbind Ctrl+U in their keybindings.
History, Autocomplete, and Confirmation Contexts
Three contexts handle the moment-to-moment flow of choosing, confirming, and recalling. history:search on Ctrl+R opens the reverse history search, which lets you filter through previous prompts by typing a substring. Inside that search, the HistorySearch context takes over with its own keybindings.
In HistorySearch, Ctrl+R cycles to the next match, Escape or Tab accepts the selection, Ctrl+C cancels, Enter executes the selected command, and Ctrl+S cycles the search scope between session, project, and everywhere. The scope toggle is powerful when you remember a prompt from a different project.
The Autocomplete context activates when the suggestion menu appears. Tab accepts the highlighted suggestion, Escape dismisses the menu, and the Up and Down arrows move between suggestions. These are simple, but they matter when you are flying through slash commands.
The Confirmation context governs permission and confirmation dialogs. Y or Enter confirms, N or Escape declines. Up and Down move between options, Tab jumps to the next field, Space toggles a selection, and Shift+Tab cycles permission modes. Ctrl+E toggles the permission explanation, which shows why Claude is asking for approval.
Task, Theme, Tabs, and Help Contexts
The Task context is active when a background task runs. Its key action is task:background, bound to both Ctrl+B and the chord Ctrl+X Ctrl+B. This sends the current task to the background so you can keep working while it completes. The chord version avoids conflict with tmux, where Ctrl+B is the prefix key.
The ThemePicker context has one binding: Ctrl+T toggles syntax highlighting in the theme preview. Tabs uses Tab and Right arrow for next, Shift+Tab and Left arrow for previous. The Help context only binds Escape to dismiss the help menu.
These contexts are small, but they round out the keybindings map. When you are navigating the plugin manager, browsing settings, or picking a theme, the right context is already active and its keybindings fire without any setup.
Transcript, Diff, and Message Selector Contexts
The Transcript context binds Ctrl+E to toggle showing all content, and q, Ctrl+C, or Escape to exit the transcript view. This keeps the transcript quick to open and close with familiar pager-style keys.
The DiffDialog context is richer because diffs involve navigation across files and sources. Escape closes the viewer. Left and Right arrows move between diff sources. Up and Down, or K and J, move between files in the list and scroll the detail view. Enter opens the diff details.
In the detail view, pager-style scroll bindings take over. PageUp and PageDown scroll half a viewport. Shift+Space and B scroll up a full page, Space scrolls down one. G or Home jumps to the top, Shift+G or End jumps to the bottom. These mirror vim and less conventions, so they feel natural if you live in a terminal and rely on consistent keybindings.
The MessageSelector context covers the rewind and summarize dialog. Up, K, and Ctrl+P move up. Down, J, and Ctrl+N move down. Ctrl+Up, Shift+Up, Meta+Up, and Shift+K all jump to the top. Ctrl+Down, Shift+Down, Meta+Down, and Shift+J jump to the bottom. Enter selects the message. The multiple bindings per action mean both arrow and vim users feel at home.
Model Picker, Select, Plugin, Settings, and Scroll
The ModelPicker context is compact. Left decreases the effort level, Right increases it, and the lowercase S key applies the highlighted model to the current session only. This pairs naturally with the Meta+P shortcut that opens the picker from the Chat context.
The Select context is the generic list handler. Down, J, and Ctrl+N go to the next option. Up, K, and Ctrl+P go to the previous one. Enter accepts, Escape cancels. Many components reuse this context, so learning these four actions covers a lot of ground across your keybindings.
The Plugin context handles the plugin browser. Space toggles plugin selection, I installs selected plugins, and F favorites a plugin so it sorts near the top of the Installed tab. The Settings context binds slash to enter search mode, R to retry loading usage data on error, Enter or Space to change a setting, and Escape to close the panel with changes already saved.
The Scroll context activates in fullscreen rendering mode. PageUp and PageDown scroll half the viewport. Ctrl+Home jumps to the start of the conversation, Ctrl+End jumps to the latest message. Selection bindings like Shift+Left, Shift+Right, Shift+Up, and Shift+Down extend the active text selection, and Ctrl+Shift+C or Cmd+C copies it.
Attachments, Footer, and Voice Contexts
The Attachments context covers image attachment navigation. Right and Left move between attachments, Backspace or Delete removes the selected one, and Down or Escape exits attachment navigation. These fire inside select dialogs where you have pasted or added multiple images.
The Footer context navigates the footer indicator bar where tasks, teams, and diff badges live. Right and Left move between items, Up deselects at the top, Down moves into the footer, Enter opens the selected item, and Escape clears the selection.
Voice dictation adds a binding to the Chat context. When enabled through /voice, the Space bar handles push-to-talk. Depending on your voice mode, you either hold Space to dictate or tap it to start and stop. This binding only exists when voice is turned on, so it never interferes with normal typing.
Keystroke Syntax: Modifiers, Chords, Special Keys
The keybindings file uses a simple keystroke syntax. You write modifiers in lowercase separated by plus signs, then the key. The keybindings parser recognizes several modifier aliases, which matters because macOS, Windows, and Linux users think about modifier keys differently.
The ctrl or control alias is the Control key. The shift alias is Shift. The alt, opt, option, and meta aliases all map to the Alt key on Windows and Linux, and the Option key on macOS. The cmd, command, super, and win aliases map to Command on macOS, the Windows key, and Super on Linux.
There is a caveat with the cmd group. Terminals only detect it when they report the Super modifier, which requires support for the Kitty keyboard protocol or xterm’s modifyOtherKeys mode. Most terminals do not send it. For bindings you want to work everywhere, stick with ctrl or meta.
ctrl+k          Ctrl + K
shift+tab       Shift + Tab
meta+p          Option+P on macOS, Alt+P elsewhere
ctrl+shift+c    Multiple modifiers combined
A standalone uppercase letter implies Shift. Writing K is the same as shift+k. This is convenient for vim-style bindings where uppercase and lowercase keys mean different things. However, an uppercase letter combined with a modifier, like ctrl+K, is stylistic only. It does not imply Shift, so ctrl+K and ctrl+k are identical.
Chords are sequences of keystrokes separated by spaces. The pattern ctrl+x ctrl+e means press Ctrl+X, release, then press Ctrl+E. Chords let you pack more actions behind a single prefix key, which is why the Ctrl+X family is so common in the default keybindings you find across the keybindings system.
Special keys use their lowercase names: escape or esc, enter or return, tab, space, up, down, left, right, backspace, and delete. Combine them freely with modifiers using the plus separator when you write keybindings.
Unbinding and Reclaiming Chord Prefixes
Setting an action to null unbinds it. This is how you free a key for something else in your keybindings, whether that is a readline shortcut, a different action, or a terminal-level feature. The null syntax works for single keys and for chords alike within the keybindings file.
{
  "bindings": [
    {
      "context": "Chat",
      "bindings": {
        "ctrl+s": null
      }
    }
  ]
}
Chord prefixes add a wrinkle. If any active context binds a chord that starts with a certain prefix, that prefix is reserved. You cannot bind the prefix as a single key until you unbind every chord that shares it. The default Ctrl+X family spans two contexts: ctrl+x ctrl+k and ctrl+x ctrl+e in Chat, and ctrl+x ctrl+b in Task.
To reclaim ctrl+x as a single-key binding, you must unbind all three chords across both contexts. The example below unbinds them and then binds ctrl+x to chat:newline in the Chat context. Note how the Task context gets its own block for the unbind, and the Chat context block handles both unbinds plus the new single-key binding.
{
  "bindings": [
    {
      "context": "Task",
      "bindings": {
        "ctrl+x ctrl+b": null
      }
    },
    {
      "context": "Chat",
      "bindings": {
        "ctrl+x ctrl+k": null,
        "ctrl+x ctrl+e": null,
        "ctrl+x": "chat:newline"
      }
    }
  ]
}
If you unbind some but not all chords on a prefix, pressing the prefix still enters chord-wait mode for the remaining bindings. That can feel like a hang if you do not expect it. Either unbind all chords on a prefix, or leave them all in place.
Vim Mode Integration
Claude Code ships a vim editor mode you can enable through /config. When it is on, vim mode and the keybindings system operate independently. Vim mode handles text input at the line level, controlling cursor movement, modes, motions, and visual selection. The keybindings handle component-level actions like toggling todos, submitting, and opening editors.
The two systems cooperate rather than compete. The Escape key in vim mode switches from INSERT to NORMAL mode. It does not trigger chat:cancel while you are in vim’s insert mode, because vim consumes the keypress first. Most Ctrl+key shortcuts pass through vim mode to the keybindings system unchanged, so your global and chat keybindings still work.
In vim NORMAL mode, the question mark shows the help menu, which is standard vim behavior. The slash key opens history search, mirroring what Ctrl+R does in standard mode. If you rely on vim muscle memory, these defaults mean you can search your prompt history without learning a new shortcut.
Vim mode covers the four modes you would expect. NORMAL mode is for navigation and commands using motions like w, b, e, dd, and cc. INSERT mode is for typing text. VISUAL mode lets you select a character range, and VISUAL LINE mode selects entire lines. The status line can display the current vim mode so you always know where you are.
Reserved Shortcuts and Terminal Conflicts
A handful of keybindings are off limits. You cannot rebind Ctrl+C because it is the hardcoded interrupt and cancel signal. You cannot rebind Ctrl+D because it is the hardcoded exit. Ctrl+M is identical to Enter in terminals since both send a carriage return, so it is reserved. Caps Lock is also reserved because terminal applications never receive it.
Beyond the reserved list, some keybindings conflict with terminal multiplexers and shell job control. Ctrl+B is the tmux prefix key, so you must press it twice to send a single Ctrl+B to Claude Code. Ctrl+A is the GNU screen prefix. Ctrl+Z suspends the foreground process via SIGTSTP, which would pause Claude Code itself.
These conflicts are why Claude Code offers chord alternatives for some actions in the default keybindings. The task:background action has both Ctrl+B and Ctrl+X Ctrl+B. The chord works inside tmux without the double-press dance, which makes it the safer choice if you run a multiplexer alongside your keybindings.
Statusline Configuration Basics
The status line is a customizable bar that sits above the built-in footer badges. It runs a shell script you configure, feeds that script JSON session data through stdin, and displays whatever the script prints to stdout. This makes it incredibly flexible for monitoring context, cost, git state, and anything else you can extract from a script.
You configure the status line in your settings file at ~/.claude/settings.json. Add a statusLine field with type set to "command" and a command pointing to your script. The command can be a script path or an inline shell command, so simple cases do not even need a separate file.
{
  "statusLine": {
    "type": "command",
    "command": "~/.claude/statusline.sh",
    "padding": 2
  }
}
The optional padding field adds horizontal spacing in characters. The optional refreshInterval field re-runs your command every N seconds on top of the event-driven updates, which helps when your script shows time-based data or when background subagents change git state while the main session is idle. The optional hideVimModeIndicator field suppresses the built-in mode text so your script can render vim mode itself.
The easiest way to set up a status line is the /statusline command. Describe what you want in plain language, and Claude Code generates a script in ~/.claude/ and wires it into your settings automatically. You can also remove a status line by asking the command to delete or clear it.
How the Statusline Works
Claude Code runs your script after each new assistant message, after /compact finishes, when the permission mode changes, and when vim mode toggles. Updates are debounced at 300 milliseconds, so rapid changes batch together and your script runs once things settle. If a new update arrives while your script is still running, the in-flight execution is cancelled.
Your script receives JSON on stdin and prints text to stdout. Each line of output becomes a separate row in the status area, so multiple echo statements produce a multiline status line. Colors work through ANSI escape codes like 33[32m for green. Links work through OSC 8 escape sequences, which turn text into clickable hyperlinks in terminals that support them.
One sizing detail matters. Claude Code captures your script’s output instead of connecting it directly to the terminal, so tput cols and language-level width detection cannot read the terminal size from inside the script. Read the COLUMNS and LINES environment variables instead, which Claude Code sets before running your command.
The status line runs locally and does not consume API tokens. It temporarily hides during certain UI interactions like autocomplete suggestions, the help menu, and permission prompts, then returns when those screens close.
Building a Statusline Script
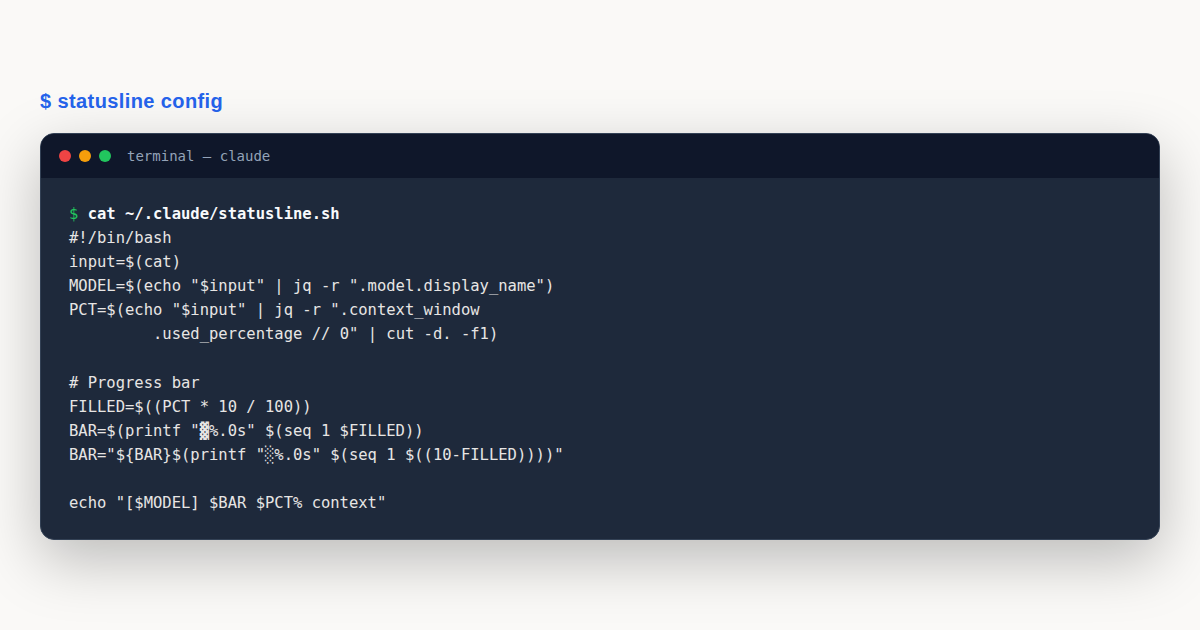
A basic status line script reads JSON from stdin, extracts fields with a tool like jq, and prints a formatted line. Save it to ~/.claude/statusline.sh, mark it executable with chmod +x, and point your settings at it. The script below shows the current model, the working directory folder name, and the context window usage percentage.
#!/bin/bash
# Read JSON data piped to stdin
input=$(cat)

# Extract fields using jq
MODEL=$(echo "$input" | jq -r '.model.display_name')
DIR=$(echo "$input" | jq -r '.workspace.current_dir')
# The "// 0" provides a fallback if the field is null
PCT=$(echo "$input" | jq -r '.context_window.used_percentage // 0' | cut -d. -f1)

# Output the status line
echo "[$MODEL] ${DIR##*/} | ${PCT}% context"
The // 0 pattern is important. Several JSON fields can be null early in a session, before the first API call populates them. Using // 0 in jq provides a fallback so your script does not print the literal string “null”. The ${DIR##*/} parameter expansion extracts just the folder name from the full path.
Statusline Data Fields You Can Display
Claude Code sends a rich JSON object to your script. Knowing the available fields unlocks the real power of the status line. The model.display_name field gives you the current model name. The workspace.current_dir and workspace.project_dir fields tell you where you are and where the session started.
The cost object tracks session economics. cost.total_cost_usd accumulates the estimated cost of all API calls. cost.total_duration_ms measures total elapsed wall-clock time, while cost.total_api_duration_ms tracks only the time spent waiting for API responses. cost.total_lines_added and cost.total_lines_removed count code changes.
The context_window object is the most useful for avoiding surprise truncation. context_window.used_percentage is a pre-calculated percentage of the window consumed. context_window.context_window_size is the maximum in tokens, which is 200000 by default or 1000000 for models with extended context. The exceeds_200k_tokens boolean flags when the combined token count crosses 200k.
Other fields round out the picture. effort.level reports the reasoning effort. thinking.enabled shows whether extended thinking is on. rate_limits gives five-hour and seven-day usage percentages for subscribers. vim.mode shows the current vim mode, output_style.name shows the output style, and version shows the Claude Code version string.
Workspace fields add repository context. workspace.repo.host, workspace.repo.owner, and workspace.repo.name are parsed from the origin remote. workspace.git_worktree appears when you are inside a linked worktree. The pr object surfaces an open pull request number, URL, and review state when one exists for the current branch.
Statusline Examples: Context, Git, and Cost
A context window progress bar is one of the most popular status line patterns. The script reads used_percentage, builds a bar of filled and empty block characters, and prints the model name alongside it. This gives you a persistent visual cue for how much room you have left before a compact or a fresh session.
#!/bin/bash
input=$(cat)

MODEL=$(echo "$input" | jq -r '.model.display_name')
PCT=$(echo "$input" | jq -r '.context_window.used_percentage // 0' | cut -d. -f1)

# Build a 10-character progress bar
BAR_WIDTH=10
FILLED=$((PCT * BAR_WIDTH / 100))
EMPTY=$((BAR_WIDTH - FILLED))
BAR=""
[ "$FILLED" -gt 0 ] && printf -v FILL "%${FILLED}s" && BAR="${FILL// /▓}"
[ "$EMPTY" -gt 0 ] && printf -v PAD "%${EMPTY}s" && BAR="${BAR}${PAD// /░}"

echo "[$MODEL] $BAR $PCT%"
A git status line adds repository awareness. This script checks whether the current directory is a git repo, counts staged and modified files, and uses ANSI colors to flag them. Green shows staged files, yellow shows modified files, and the branch name sits next to the directory folder.
#!/bin/bash
input=$(cat)

MODEL=$(echo "$input" | jq -r '.model.display_name')
DIR=$(echo "$input" | jq -r '.workspace.current_dir')

GREEN='33[32m'
YELLOW='33[33m'
RESET='33[0m'

if git rev-parse --git-dir > /dev/null 2>&1; then
    BRANCH=$(git branch --show-current 2>/dev/null)
    STAGED=$(git diff --cached --numstat 2>/dev/null | wc -l | tr -d ' ')
    MODIFIED=$(git diff --numstat 2>/dev/null | wc -l | tr -d ' ')

    GIT_STATUS=""
    [ "$STAGED" -gt 0 ] && GIT_STATUS="${GREEN}+${STAGED}${RESET}"
    [ "$MODIFIED" -gt 0 ] && GIT_STATUS="${GIT_STATUS}${YELLOW}~${MODIFIED}${RESET}"

    echo -e "[$MODEL] ${DIR##*/} | $BRANCH $GIT_STATUS"
else
    echo "[$MODEL] ${DIR##*/}"
fi
A cost and duration tracker turns the status line into a budget monitor. This script formats the estimated session cost as currency and converts the elapsed milliseconds into minutes and seconds. It also pulls the API-only duration so you can see how much of your session was spent waiting on responses.
#!/bin/bash
input=$(cat)

MODEL=$(echo "$input" | jq -r '.model.display_name')
COST=$(echo "$input" | jq -r '.cost.total_cost_usd // 0')
DURATION_MS=$(echo "$input" | jq -r '.cost.total_duration_ms // 0')

COST_FMT=$(printf '$%.2f' "$COST")
DURATION_SEC=$((DURATION_MS / 1000))
MINS=$((DURATION_SEC / 60))
SECS=$((DURATION_SEC % 60))

echo "[$MODEL] $COST_FMT | ${MINS}m ${SECS}s"
Multiline and Colored Statuslines
Your script can print multiple lines, and each becomes its own row. A common pattern puts git and model info on the first line, then a color-coded context bar on the second. Threshold-based coloring makes the bar easy to scan at a glance: green when you have plenty of room, yellow as you approach the limit, and red when you are nearly full.
#!/bin/bash
input=$(cat)

MODEL=$(echo "$input" | jq -r '.model.display_name')
DIR=$(echo "$input" | jq -r '.workspace.current_dir')
COST=$(echo "$input" | jq -r '.cost.total_cost_usd // 0')
PCT=$(echo "$input" | jq -r '.context_window.used_percentage // 0' | cut -d. -f1)

# Color based on context usage threshold
GREEN='33[32m'; YELLOW='33[33m'; RED='33[31m'; RESET='33[0m'
if [ "$PCT" -lt 70 ]; then COLOR="$GREEN"
elif [ "$PCT" -lt 90 ]; then COLOR="$YELLOW"
else COLOR="$RED"; fi

# Line 1: model, directory, git branch
BRANCH=$(git branch --show-current 2>/dev/null)
LINE1="[$MODEL] ${DIR##*/}"
[ -n "$BRANCH" ] && LINE1="$LINE1 | $BRANCH"

# Line 2: colored context bar and cost
LINE2="${COLOR}${PCT}% context${RESET} | $$(printf '%.2f' "$COST")"

echo -e "$LINE1"
echo -e "$LINE2"
The echo -e flag tells bash to interpret escape sequences, which is what makes the ANSI color codes take effect. You can use any ANSI color code your terminal supports. Common choices are 33[31m for red, 33[32m for green, 33[33m for yellow, 33[34m for blue, and 33[0m to reset back to the default.
For clickable links, use OSC 8 escape sequences. These wrap text in an invisible hyperlink that opens on Cmd+click in macOS or Ctrl+click on Windows and Linux. You need a terminal that supports hyperlinks, like iTerm2, Kitty, or WezTerm, but when it works it turns your status line into a navigation surface.
You are not limited to Bash. Python and Node.js both have built-in JSON parsing, so you can write your status line script in whichever language you prefer. The contract is the same: read JSON from stdin, print text to stdout. Some developers prefer Python for its cleaner string handling when building colored multiline output.
For the complete and current reference on every shortcut and status line field, bookmark the official keybindings documentation and the official statusline documentation. Those pages track every new field and action as Claude Code evolves.
A Worked Example: Customizing a Daily Workflow
Imagine you spend hours every day inside Claude Code. You run tmux, you switch models often, and you want the todo list visible by default. The default keybindings are close to what you want, but a few shortcuts feel awkward. This walkthrough shows how to reshape them into a setup that fits a real daily rhythm.
Start by running /keybindings to open the config file. The first change is reclaiming Ctrl+U. By default it may conflict with your readline habit of using it to delete to the beginning of the line. You set "ctrl+u": null in the Chat context, save, and immediately the readline behavior works again. No restart needed because the file reloads live.
Next, you want a faster way to jump between modes. Shift+Tab already cycles permission modes, but you also want a dedicated key for plan mode. You check the available chat actions, find there is no direct plan-mode action, and decide to use chat:cycleMode with an additional chord. You bind ctrl+x ctrl+p to cycle mode as a backup, knowing the Ctrl+X prefix is already familiar from the editor chord.
Now you tackle the model picker. Meta+P works, but your terminal sometimes swallows the Meta modifier. You add ctrl+x ctrl+m as an alternative binding for chat:modelPicker in the Chat context. Because it is a chord on the Ctrl+X prefix, it coexists with the existing ctrl+x ctrl+e and ctrl+x ctrl+k bindings without conflict.
Then you set up the status line. You run /statusline show model name, git branch, and a context bar with cost. Claude Code generates a script and wires it into your settings. The first line shows the model and branch. The second line shows a colored context percentage and the running cost. You notice the bar stays green most of the session, turns yellow around 70 percent, and flips red near 90 percent.
You enable vim mode through /config because you prefer modal editing for long prompts. The status line picks up the vim mode field and renders it at the end of the first line. You add hideVimModeIndicator: true to your status line config so the built-in -- INSERT -- text disappears, since your script now handles that display.
Halfway through the day, you realize the status line goes stale while you wait on a long background subagent. The git branch does not update because no assistant message fires during the wait. You add refreshInterval: 10 to your status line config. Now the script re-runs every 10 seconds regardless of events, and the branch and cost stay current even during idle stretches.
Finally, you validate everything. You restart Claude Code with --debug and scan the log for keybinding warnings. You see none, which confirms your chords, contexts, and null unbinds are all valid. The result is a tightly personalized setup where every shortcut matches your reflexes, the status line keeps you informed, and nothing gets in your way.
Keybindings: Common Mistakes to Avoid
Even experienced developers trip over the same issues with keybindings. Most problems come from placing a binding in the wrong context, forgetting about chord prefixes, or ignoring reserved shortcuts. Here are the pitfalls that cause the most frustration.
- Wrong context. A Chat binding will not fire inside the Confirmation or Autocomplete context. If a shortcut silently refuses to work, check that you placed it in the context where the target UI actually has focus.
- Unbinding only one chord. If you unbind a single chord on a prefix like Ctrl+X but leave others, pressing the prefix still enters chord-wait mode. You must unbind every chord sharing a prefix to reclaim it as a single key.
- Trying to rebind reserved keys. Ctrl+C, Ctrl+D, Ctrl+M, and Caps Lock are hardcoded. No amount of JSON will reassign them, and Claude Code will warn you on load if you try.
- Forgetting terminal conflicts. Ctrl+B fights tmux, Ctrl+A fights screen, and Ctrl+Z suspends the process. Use the chord alternatives, like Ctrl+X Ctrl+B for backgrounding, to avoid the double-press dance.
- Ignoring null fields in the status line. Several JSON fields are null before the first API call. Always use the
// 0jq fallback or equivalent defaults, or your status line will print the literal string “null”.
Keybindings: Best Practices
- Keep the
$schemafield in your keybindings file so your editor validates context names, actions, and keystroke syntax as you type. - Prefer chords on the Ctrl+X prefix for new bindings, since that family is already established and avoids conflicts with common terminal shortcuts.
- Use
nullto unbind defaults you never use, rather than leaving them to potentially conflict with readline shortcuts or terminal features. - Test custom keybindings with the
--debugflag after major changes, so validation warnings surface in the log before they bite you mid-session. - Set a
refreshIntervalon your status line if you run background subagents, so time-based segments like git branch and cost stay current during idle periods. - Handle absent and null JSON fields with fallback defaults in every status line script, since many fields are missing before the first API response or after a compact.
- Document your custom bindings with a comment at the top of the file, so future you remembers why each shortcut was added or removed.
Keybindings: Frequently Asked Questions
Where is the keybindings file stored?
The keybindings file lives at ~/.claude/keybindings.json. Run the /keybindings command inside Claude Code to create or open it with a scaffolded template. Changes apply live without a restart.
Can I rebind Ctrl+C or Ctrl+D?
No. Ctrl+C is the hardcoded interrupt and Ctrl+D is the hardcoded exit. Both are reserved, along with Ctrl+M and Caps Lock. Claude Code will warn you if you try to reassign any of them in your keybindings.
How do I unbind a default shortcut?
Set the action to null in the relevant context. For example, "ctrl+u": null in the Chat context frees Ctrl+U so the readline backward-kill behavior works. This also applies to chord bindings.
Do keybindings work with vim mode?
Yes. Vim mode handles text input while keybindings handle component actions. Most Ctrl+key shortcuts pass through vim mode unchanged, and in vim NORMAL mode the slash key opens history search just like Ctrl+R in standard mode.
How does the status line get its data?
Claude Code pipes a JSON object to your script via stdin. The script reads it, extracts fields with a tool like jq, and prints text to stdout. It runs after each assistant message and on other events, with optional timed refresh.
Keybindings give you total control over how Claude Code feels under your fingers. The JSON file at ~/.claude/keybindings.json reloads live, the context system keeps bindings scoped, null unbinding reclaims unwanted defaults, and the status line turns session data into a persistent dashboard. Master these pieces and your terminal workflow becomes fast, personal, and predictable.