


Output styles change how Claude Code talks to you, not what it knows. They reshape the system prompt to set the role, tone, and format of every response. This guide walks through the four built-in styles, shows you how to build a custom one, and explains when to keep coding instructions turned on.

Output Styles: What You’ll Learn
Output styles are one of the most overlooked configuration options in Claude Code. Most people stick with the default and never explore what happens when they switch. By the end of this guide, you will know exactly which output style fits each workflow and how to write your own.
We will cover the four built-in output styles, the three-step process for creating custom ones, and the key differences between styles, CLAUDE.md files, and other prompt-shaping features. You will also see a full worked example of building a security review style from scratch.
What Are Output Styles?
Output styles modify the system prompt that Claude Code sends to the model at the start of every conversation. They tell Claude how to behave, what tone to use, and what format to prefer for its answers. Think of them as personality presets for your coding assistant.
The important distinction is that output styles do not change what Claude knows. They change how Claude communicates what it knows. A style that says “be concise” will produce shorter answers. A style that says “teach me” will produce longer, more educational responses. The underlying model capability stays the same.
Output styles work by appending custom instructions to the end of the system prompt. When you select a built-in style or activate a custom one, Claude Code reads the style definition and folds it into the prompt that frames every interaction. This is why switching styles changes behavior immediately after a session restart.
There is a critical design choice baked into the system. Built-in output styles like Default and Proactive keep Claude Code’s software engineering instructions. These instructions tell Claude to scope changes carefully, write comments, and verify its work. Custom output styles leave those instructions out by default unless you explicitly opt in.
This means a custom output style transforms Claude Code from a coding assistant into something else entirely. You can turn it into a writing coach, a data analyst, a code reviewer with a specific lens, or anything else you can describe in a Markdown file. The flexibility is significant once you understand the mechanics.
Output styles persist across conversations within a project. Once you set one through the configuration menu, it saves to your local settings file and applies to every new session until you change it again. This makes them reliable for ongoing work where you want consistent behavior.
The Four Built-in Output Styles
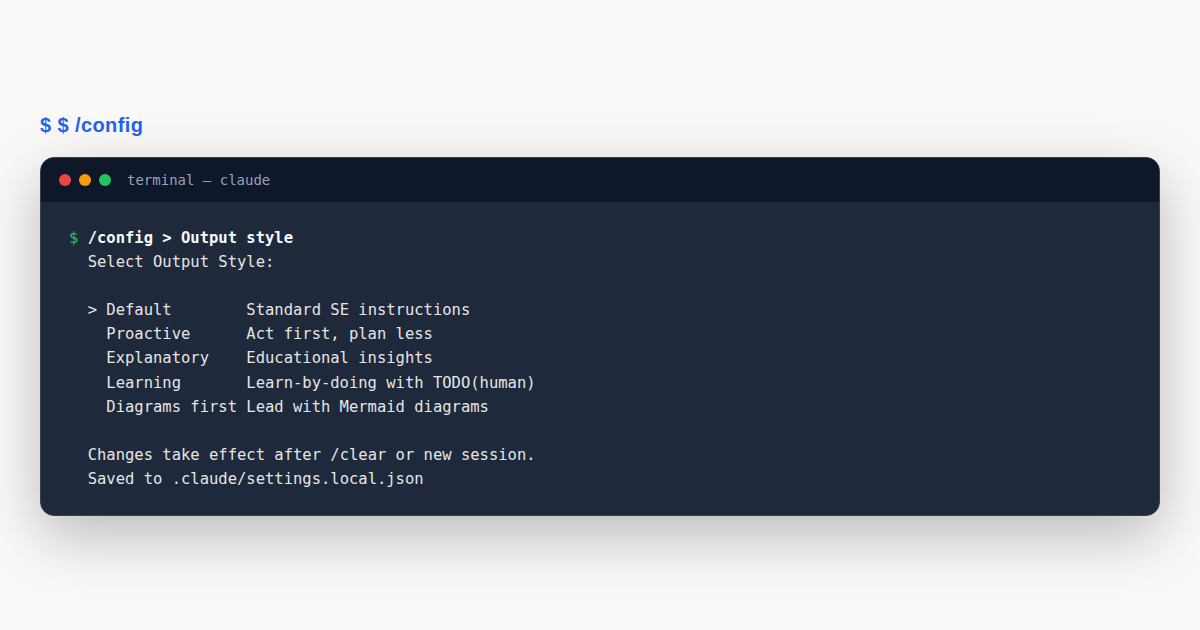
Claude Code ships with four output styles ready to use. Each one targets a different working style and communication preference. You do not need to create any files or write any configuration to try them. Just open the config menu and switch.
1. Default
The Default style is what you get when you first install Claude Code. It uses the existing system prompt designed for software engineering tasks. Claude will scope changes, explain its reasoning when asked, write comments in code, and verify its work before reporting back.
This style balances action and explanation. It does not rush into changes, but it also does not over-explain. Most people will never need to switch away from Default for everyday coding work. It is the safe, predictable baseline.
Use Default when you want standard behavior. You are working on features, fixing bugs, refactoring code, and you want Claude to behave like a competent pair programmer who communicates clearly without being verbose.
2. Proactive
The Proactive style pushes Claude to act first and explain later. It executes immediately, makes reasonable assumptions, and prefers doing something over planning something. This is stronger than the autonomous guidance you get from auto permission mode.
Proactive does not change your permission settings. You will still see permission prompts for actions that require approval. What changes is Claude’s willingness to propose and attempt actions without first asking whether you want it to.
Use Proactive when you have a clear task and you want Claude to move fast. This works well for familiar changes where you trust the outcome. It is less ideal for risky operations or unfamiliar codebases where you want more deliberation before action.
The difference between Proactive and Default is mostly about momentum. Default might ask “Should I refactor this function?” before acting. Proactive will refactor it, show you the result, and let you push back if you disagree. For experienced developers working in well-tested code, this saves a round trip on every task.
3. Explanatory
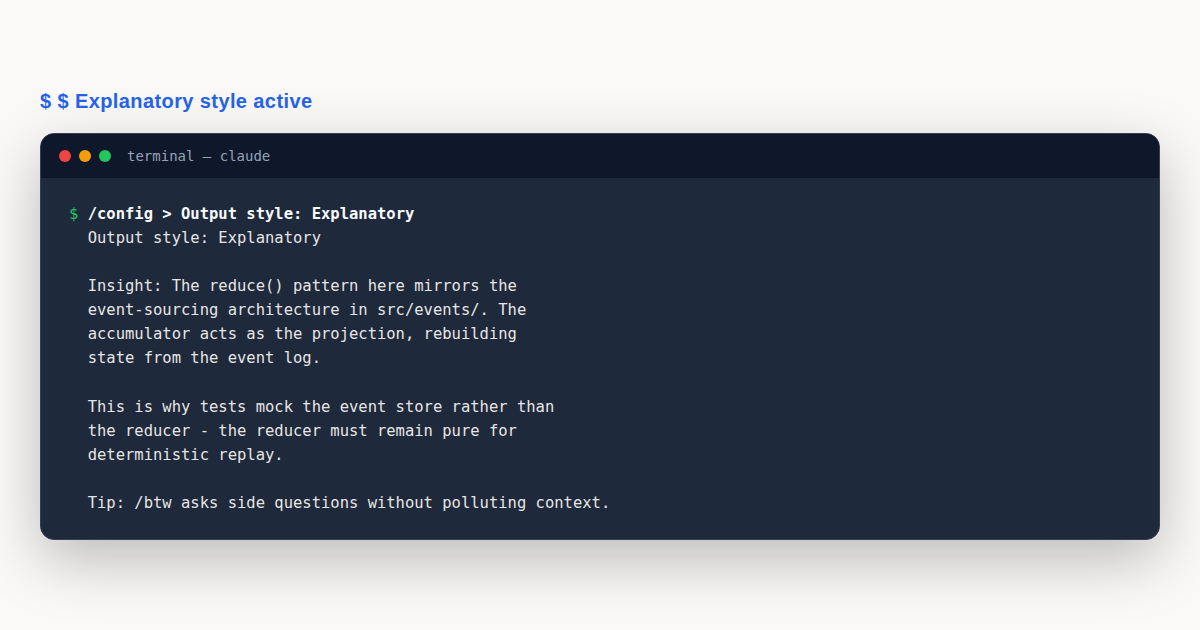
The Explanatory style adds educational context between software engineering tasks. After completing work, Claude inserts “Insights” that help you understand the implementation choices it made and the patterns it followed in your codebase.
This style is valuable when you are working in an unfamiliar codebase, learning a new framework, or onboarding to a project. Instead of just getting the answer, you get the reasoning behind it. Over time, these insights build your mental model of the code.
The trade-off is that responses get longer. Every task comes with explanatory text that adds to the output token count. If you are doing repetitive work where you already understand the patterns, this overhead adds up. Switch to Explanatory when learning, then switch back when you no longer need the commentary.
Explanatory keeps the built-in coding instructions. Claude still scopes changes, writes comments, and verifies work. The educational layer sits on top of the standard engineering behavior. You get the best of both worlds when you are in learning mode.
4. Learning
The Learning style is the most interactive of the four. It shares the same Insights as Explanatory, but it also asks you to contribute code. Claude will add TODO(human) markers in the output, flagging spots where it wants you to write or complete part of the implementation.
This turns Claude Code from a tool that writes code for you into a tool that teaches you to write code. It is collaborative rather than transactional. You and Claude take turns building the solution, with Claude providing guidance and scaffolding while you fill in pieces.
Learning is excellent for onboarding new team members, practicing a new language, or studying a framework. The TODO(human) markers create natural stopping points where you apply what you just learned from the Insights. It is learn-by-doing, guided by an expert.
The style assumes you want to participate. If you just want Claude to do the work, Learning will feel slow and interactive in ways you might find frustrating. Pick it deliberately when your goal is skill building, not just output.
How to Change Your Output Style
Switching output styles takes a few seconds. The primary method is the configuration menu inside Claude Code itself. Run the slash command and pick from the list.
/configThis opens an interactive menu. Navigate to the “Output style” option and you will see all available styles, including any custom ones you have created. Select one and it saves to your local settings file at .claude/settings.local.json.
The change takes effect after you clear the current session or start a new one. Run /clear to reset the conversation, or simply open a new terminal. Claude Code reads the setting on startup and applies it to the system prompt.
You can also set the style directly by editing the settings file. This is useful if you want to script configuration or share settings across a team through version control.
{
  "outputStyle": "Explanatory"
}
Put this in .claude/settings.local.json for a project-level setting, or in ~/.claude/settings.json for a user-level default. The project setting takes precedence over the user setting when both exist.
The Deprecated Output-Style Command
If you have been using Claude Code for a while, you might remember a dedicated /output-style command. That command was deprecated in version 2.1.73 and removed entirely in version 2.1.91. If you try to run it now, nothing happens.
The replacement is the /config menu or the outputStyle setting in your JSON files. This consolidation moved output styles into the same configuration system as everything else, which keeps the slash command list cleaner and makes settings easier to manage.
If you have old scripts or documentation that reference /output-style, update them now. The command will not come back, and relying on it will silently fail on current versions of Claude Code.
Creating a Custom Output Style
The real power of output styles comes from building your own. A custom output style is just a Markdown file with frontmatter and instructions. You describe how you want Claude to behave, and Claude Code loads it into the system prompt.
The process has three steps. You create a file, write the instructions, and then switch to the style through the config menu. No build step, no compilation, no special syntax beyond standard Markdown.
Step 1: Create the Markdown File
Output style files live in an output-styles directory inside a .claude folder. There are three locations where Claude Code looks for them, and each has a different scope.
~/.claude/output-styles/        # User level: available everywhere
.claude/output-styles/          # Project level: available in this repo
[managed]/.claude/output-styles/ # Managed policy: enforced by admins
User-level styles follow you across every project on your machine. Project-level styles are specific to the repository where the .claude directory lives. Managed styles are set by administrators and apply to everyone under the policy.
The file name becomes the style name unless you override it in the frontmatter. A file called diagrams-first.md shows up as “diagrams-first” in the config picker. Use clear, descriptive file names so you can find styles quickly.
Project output styles load from every .claude/output-styles/ directory between your current working directory and the repository root. As of version 2.1.178, when nested directories define the same style name, Claude Code uses the one closest to the working directory. This lets you override a repo-wide style with a more specific one in a subdirectory.
Step 2: Add Frontmatter and Instructions
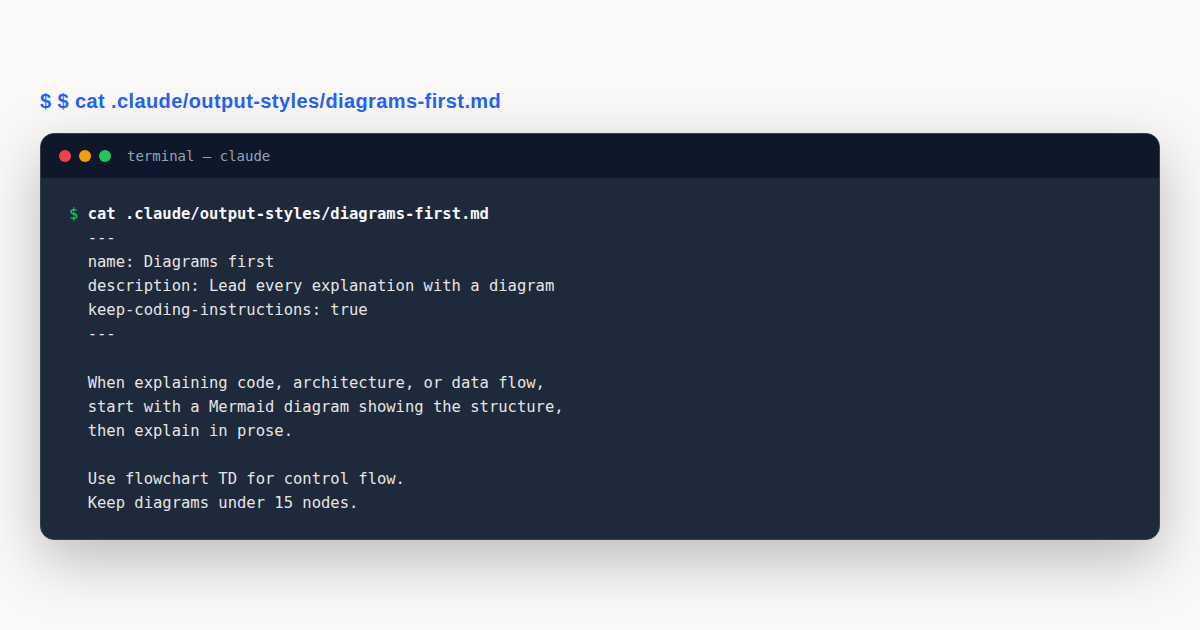
Every output style file starts with YAML frontmatter between two sets of three dashes. The frontmatter tells Claude Code how to display and apply the style. After the frontmatter, you write the actual instructions in Markdown.
---
name: Diagrams first
description: Lead every explanation with a diagram
keep-coding-instructions: true
---

When explaining code, architecture, or data flow, start with a Mermaid diagram
showing the structure, then explain in prose.

## Diagram conventions

Use `flowchart TD` for control flow and `sequenceDiagram` for request paths.
Keep diagrams under 15 nodes so they stay readable on standard screens.
The frontmatter fields are straightforward. The name field overrides the file name if you want a different display label. The description field shows in the config picker so you can tell styles apart. The keep-coding-instructions field controls whether Claude keeps its engineering behavior.
The instruction body is where the real work happens. Be specific about what you want. Vague instructions like “be helpful” do not change behavior in meaningful ways. Concrete rules like “start with a diagram, then explain, keep diagrams under 15 nodes” give Claude something actionable to follow.
Break long instructions into sections with headings. Claude reads the entire file, but well-structured instructions are easier to maintain and easier for you to edit later. Think of the file as a brief you are writing to a new teammate who is very capable but needs clear direction.
Step 3: Switch to Your Style
After saving the file, open the config menu and select your new style.
/configYou will see your custom style listed alongside the built-in ones. Pick it, clear the session, and the new instructions take effect on the next conversation turn.
If your style does not appear in the list, check the file location first. The most common mistake is putting the file in the wrong directory. The path must be .claude/output-styles/your-style.md, not .claude/output_styles/ or .claude/styles/. Underscores and alternative folder names will not be recognized.
Plugins can also ship output styles. If you install a plugin that includes an output-styles/ directory, those styles appear in your config picker automatically. This is how teams can share styles across projects through a common plugin rather than copying files around.
Another common pitfall is malformed frontmatter. YAML is sensitive to indentation and formatting. If your frontmatter has a tab character instead of spaces, or if the colon after a field name is missing, the style file will not parse. Claude Code silently ignores files with broken frontmatter rather than showing an error. Validate your YAML before deploying.
You can verify a style loaded correctly by checking the config menu after restarting. If the style name appears in the picker, the frontmatter parsed successfully. If it does not appear, the file has a structural problem. Open it in a text editor with YAML syntax highlighting to catch errors visually.
Frontmatter Reference
The frontmatter at the top of your output style file controls how Claude Code interprets and applies the style. There are four fields, and only one is required for the style to work. Understanding each field helps you write styles that behave predictably.
| Field | Purpose | Default |
|---|---|---|
name |
The style name shown in the config picker. Use this if you want a display name different from the file name. | File name |
description |
A short label shown next to the style in the config menu. Helps you remember what the style does. | None |
keep-coding-instructions |
Controls whether Claude keeps its built-in software engineering instructions. Set to true for coding workflows, false for non-coding tasks. | false |
force-for-plugin |
Plugin-only field. When true, the style auto-applies when the plugin is enabled. Overrides the user’s current outputStyle setting. If multiple plugins set this, the first loaded one wins. | false |
The keep-coding-instructions field deserves special attention because it fundamentally changes what Claude Code does. When false, your custom instructions replace the engineering guidance entirely. Claude no longer scopes changes by default, does not add verification steps, and follows only your custom rules.
When true, your instructions are added on top of the existing engineering behavior. Claude still scopes changes and verifies work, but it also follows your custom rules. This is what you want for most coding-adjacent styles.
The force-for-plugin field is only relevant if you are building a plugin. Regular users will never set it. Plugin authors use it to enforce a specific output style when their plugin is active, which ensures the plugin’s instructions are presented in the right format regardless of what the user had selected.
How Output Styles Modify the System Prompt
Understanding the mechanics helps you predict how a style will behave. Output styles work by modifying the system prompt, which is the hidden message that frames every conversation Claude has with the model.
When you select a style, Claude Code takes the style’s instructions and appends them to the end of the system prompt. The model receives the combined prompt at the start of the conversation and uses it to guide every response. This is why switching styles requires a session clear or restart. The prompt is set once at the beginning.
Built-in styles like Default and Proactive include Claude Code’s full set of software engineering instructions. These cover change scoping, comment writing, verification steps, and other behaviors that make Claude a careful coding assistant. Custom styles do not include these unless you set keep-coding-instructions: true.
All output styles, whether built-in or custom, trigger periodic reminders during the conversation. These reminders nudge the model to adhere to the style instructions even as the conversation grows long. Without them, models tend to drift back toward default behavior after many turns.
Token usage is worth thinking about. Adding instructions to the system prompt increases input tokens on every request. Prompt caching reduces the cost after the first request in a session, so the per-turn overhead is small for long conversations. The bigger cost is output tokens.
Styles like Explanatory and Learning produce longer responses because they add educational context and interactive elements. If you are tracking token costs, be aware that these styles can double your output token usage compared to Default. For most workflows the benefit outweighs the cost, but it is worth knowing.
Output Styles and Prompt Caching
Prompt caching is the mechanism that makes output styles affordable in practice. When Claude Code sends the system prompt to the model, the prompt is cached on the server side. Subsequent requests in the same session reuse the cached prompt instead of reprocessing it from scratch. This means the token overhead from your style instructions is paid once, not on every turn.
The practical implication is that long, detailed style files are not as expensive as they seem. A style with 500 tokens of instructions adds those tokens to the first request, but every following request in the session benefits from the cache. For conversations with dozens of turns, the amortized cost per turn is negligible.
This is why it makes sense to be thorough when writing custom output styles. A rich, detailed instruction set produces more consistent behavior than a sparse one, and the caching mechanism keeps the cost manageable. Do not skimp on instructions just to save tokens.
Output Styles vs CLAUDE.md vs Other Features
Claude Code has several features that shape how the model behaves. They overlap in confusing ways if you do not understand their distinct roles. Here is how output styles compare to the other prompt-shaping tools available.
| Feature | How It Works | Use When |
|---|---|---|
| Output styles | Modifies the system prompt to set role, tone, and output format for every turn. | You want a different communication style on every response. |
| CLAUDE.md | Adds a user message after the system prompt with project context and conventions. | You want to share codebase context, coding standards, or project-specific rules. |
| –append-system-prompt | Appends text to the system prompt without removing anything. | You need a one-off addition for a single invocation without changing settings. |
| Agents | Launches a subagent with its own system prompt, model, and tool set. | You need a separately scoped helper that runs in isolation from the main session. |
| Skills | Loads task-specific instructions when invoked. | You have a reusable workflow that should activate on demand, not constantly. |
The key difference between output styles and CLAUDE.md is what they modify. Output styles change the system prompt itself. CLAUDE.md adds a user message after the system prompt. This distinction matters because the system prompt has higher priority in the model’s attention.
Use output styles when you want to change how Claude communicates. Use CLAUDE.md when you want to tell Claude about your project. The two features work well together. A CLAUDE.md file provides the what (your codebase, your conventions), and an output style provides the how (concise, educational, diagram-first).
The --append-system-prompt flag is for temporary additions. If you want Claude to adopt a specific behavior for one session without saving a style file, pass the instruction through the flag. This is useful for quick experiments before committing to a full custom style.
Agents and skills are scoped differently. Agents run as separate processes with their own prompts and tools. Skills load on demand when triggered. Output styles apply globally to the main session. If you need behavior that only activates in certain situations, use agents or skills. If you need consistent behavior across the whole session, use an output style.
keep-coding-instructions: When True, When False
The keep-coding-instructions frontmatter field is the most important decision you make when writing a custom output style. It determines whether Claude retains its software engineering training or operates purely on your custom instructions.
Set it to true when Claude is still doing software engineering work. If your style adds a lens on top of coding tasks, like “always include security considerations” or “write tests first,” you want the engineering instructions preserved. Your style layers on top of the solid foundation.
Set it to false, or leave it out, when Claude is not doing software engineering at all. If you are building a writing assistant, a data analyst, a brainstorming partner, or any non-coding role, the engineering instructions get in the way. Claude might try to scope changes to your essay or verify its poetry. Leaving the instructions out gives you a clean slate.
The default is false. This is a deliberate choice. It means custom styles do not accidentally inherit coding behaviors that might conflict with your instructions. If you want coding behavior, you opt in explicitly. This prevents surprising interactions between your custom rules and the built-in engineering guidance.
A common mistake is forgetting to set this field when creating a coding-focused style. You write detailed instructions for code review, for example, but leave out the flag. Claude follows your review instructions but drops the careful change-scoping and verification behaviors. The result feels incomplete. Always set keep-coding-instructions: true for styles that operate on code.
Proactive Style vs Auto Permission Mode
People often confuse the Proactive output style with auto permission mode. They sound similar because both make Claude feel more autonomous. But they control different things.
Auto permission mode controls which actions Claude can take without asking you first. When auto mode is on, Claude skips permission prompts for file edits, command execution, and other operations. You trust Claude to act, and it does not pause to confirm.
The Proactive style controls Claude’s willingness to propose and attempt actions. It does not grant any new permissions. You still see every permission prompt that your settings require. What changes is Claude’s behavior between prompts. It assumes you want action, so it takes initiative rather than waiting for explicit instructions.
You can use them together or separately. Proactive without auto mode means Claude eagerly proposes changes but still pauses for your approval on each one. Auto mode without Proactive means Claude can act without prompts but only when you explicitly ask it to. Both together means Claude eagerly proposes and executes changes with minimal friction.
For most developers, Proactive alone is a good starting point. It speeds up the workflow by reducing the back-and-forth of “should I do this?” questions, while still keeping you in control of permissions. Add auto mode when you trust the workflow enough to remove the safety rails.
Practical Scenarios for Each Style
Choosing the right output style depends on what you are doing. Here are concrete scenarios where each built-in style shines, along with suggestions for custom styles you might build.
Default for Everyday Coding
Use Default for feature development, bug fixes, and refactoring. This is the workhorse style. Claude scopes changes, writes clear code, explains its reasoning when asked, and does not overwhelm you with commentary. If you are not sure which style to use, Default is almost always the right answer.
Proactive for Familiar Tasks
Switch to Proactive when you are working in a codebase you know well and doing tasks you have done many times. Routine updates, dependency bumps, test additions, and repetitive refactors all benefit from Claude’s eagerness to act. You save time on every task because Claude skips the “should I?” question.
Explanatory for Learning a Codebase
Turn on Explanatory when you join a new project, inherit an unfamiliar codebase, or start working with a framework you have not used before. The Insights that Claude adds after each task will accelerate your understanding. Switch back to Default once you feel comfortable and the commentary becomes noise.
Learning for Onboarding and Practice
Use Learning when you are studying a new language or framework and want hands-on practice. The TODO(human) markers create structured exercises where you apply what Claude teaches. This is also excellent for onboarding junior developers. They learn the codebase and the patterns while contributing real code.
Custom: Diagrams First
Build a “Diagrams first” style if you are a visual learner or if you work on architecture-heavy projects. Every explanation starts with a Mermaid diagram showing the structure, followed by prose. This is especially useful for documenting systems, reviewing designs, or explaining data flow to stakeholders.
Custom: Security Focused
Create a “Security focused” style for code reviews where security is the priority. The style instructs Claude to flag potential vulnerabilities, check input validation, review authentication and authorization logic, and reference common security patterns like OWASP guidelines. Keep coding instructions on so Claude still produces working code while adding the security lens.
Custom: Documentation Writer
A “Documentation writer” style shifts Claude from writing code to writing docs. Set keep-coding-instructions: false since this is not a software engineering task. The style tells Claude to produce clear prose, use active voice, structure content with headings, and include code examples in fenced blocks. This is useful when you need to generate README files, API docs, or user guides from existing code.
Custom: Test Driven
Build a “Test driven” style that makes Claude write tests first, then implementation. The style instructs Claude to always start with a failing test, show the test output, then write the minimum code to pass it. Keep coding instructions on so Claude retains its engineering discipline. This style enforces a discipline that many teams aspire to but struggle to maintain consistently.
External Resources
This guide covers output styles in depth, but the official documentation has additional details and updates as new features ship. See the official Claude Code output styles documentation for the latest reference material and version-specific notes.
The official docs are particularly useful for tracking deprecation timelines, new frontmatter fields, and behavioral changes between versions. If something in this guide does not match what you see in your version of Claude Code, check the docs for recent updates.
A Worked Example: Building a Security Review Style
Let us walk through creating a custom output style from start to finish. We will build a “Security focused” style that transforms Claude Code into a security-aware code reviewer. This is a practical style that adds real value to any team doing regular security reviews.
First, decide where the style should live. Since this is useful across all projects, we will put it at the user level so it is available everywhere. Create the directory and file in your home folder.
mkdir -p ~/.claude/output-styles
cat > ~/.claude/output-styles/security-focused.md << 'EOF'
---
name: Security focused
description: Reviews code with a security-first lens
keep-coding-instructions: true
---

Review all code changes with security as the top priority.

## What to check

For every change, evaluate:
- Input validation and sanitization
- Authentication and authorization logic
- SQL injection and command injection vectors
- Sensitive data exposure in logs or responses
- Dependency vulnerabilities

## Output format

Start with a severity summary (Critical, High, Medium, Low, Info).
Then list each finding with the file, line, and a specific fix recommendation.
End with an overall security posture assessment.

## References

When flagging issues, cite the relevant OWASP category or CWE number
so the developer can research the underlying vulnerability class.
EOF
The frontmatter sets keep-coding-instructions: true because we want Claude to retain its engineering capabilities while adding the security lens. The description helps us identify the style in the config picker. The name gives it a clean label.
The instruction body is specific and structured. It tells Claude exactly what to check, how to format the output, and what references to include. This level of detail is what separates a useful custom style from a vague one that does not change behavior meaningfully.
Now switch to the style. Open Claude Code in any project and run the config command.
/configNavigate to “Output style” and select “Security focused” from the list. Run /clear to reset the session. The next conversation turn will use the new style.
To test it, ask Claude to review a piece of code. Try something with an obvious vulnerability, like a SQL query built with string concatenation. Claude should now respond with a severity summary, specific findings with file and line references, and OWASP or CWE citations.
The response format will look different from Default mode. Instead of just fixing the code, Claude leads with the security assessment. This is the style doing its job. The instructions in the Markdown file are shaping every response.
If the style does not take effect, check a few things. Confirm the file is at ~/.claude/output-styles/security-focused.md. Verify the frontmatter has the correct three-dash delimiters. Make sure you ran /clear or started a new session after switching. Output styles only load at session start.
Once confirmed working, you can iterate on the instructions. Maybe you want Claude to also check for rate limiting, CORS configuration, or secrets in environment variables. Edit the Markdown file, save it, clear the session, and the updated instructions apply immediately. No rebuild step, no restart of Claude Code itself.
This workflow shows the full cycle of creating, deploying, testing, and refining a custom output style. The same process applies to any style you want to build. Start with a clear purpose, write specific instructions, test with real tasks, and refine based on what you observe.
You can also share the style with your team. Commit the file to a shared plugin or put it in the project-level .claude/output-styles/ directory. Everyone who clones the repo gets the style automatically. This is how teams standardize their interaction with Claude Code across projects.
Version control is important for shared styles. When multiple developers rely on the same style file, changes to that file affect everyone. Use pull requests to review modifications, and document why each instruction exists. A style that works well for one team might need adjustment when adopted by another group with different conventions.
Testing a shared style before rolling it out saves headaches. Have one or two team members use the style for a week, collect their feedback, and iterate. Small wording changes in the instruction file can produce noticeable differences in behavior. Treat the style file as a product that needs refinement, not a one-time configuration task.
Output Styles: Common Mistakes to Avoid
Output styles are powerful but easy to get wrong. Here are the most frequent mistakes people make when working with custom output styles, along with how to fix them.
- Forgetting keep-coding-instructions. You write a coding-focused style but leave out the flag. Claude drops its engineering behaviors and follows only your custom rules. Fix: set
keep-coding-instructions: truein the frontmatter for any style that operates on code. - Wrong directory or file name. You put the file in
.claude/styles/or use underscores in the folder name. The style never appears in the config picker. Fix: use exactly.claude/output-styles/with a hyphen. Check the path character by character. - Not clearing the session. You switch styles and expect immediate change. The old system prompt is still active for the current conversation. Fix: run
/clearor start a new session after switching output styles. The prompt only loads at startup. - Confusing styles with CLAUDE.md. You put project conventions and codebase context in an output style file instead of CLAUDE.md. The instructions are applied globally even when irrelevant. Fix: use CLAUDE.md for project context, output styles for communication format and role.
Output Styles: Best Practices
- Start with a built-in style before building a custom one. Try Default, Proactive, Explanatory, and Learning to understand the range of behaviors available.
- Write specific, structured instructions in your custom styles. Vague directions like “be helpful” barely change behavior. Concrete rules produce consistent results.
- Set
keep-coding-instructions: truefor any style used during software engineering work. Leave it false only for non-coding tasks. - Share useful styles through project-level directories or plugins so the whole team benefits from consistent interaction patterns.
- Clear the session after switching styles. The system prompt only loads at startup, so changes need a fresh conversation to take effect.
Output Styles: Frequently Asked Questions
What is the difference between output styles and CLAUDE.md?
Output styles modify the system prompt to set role, tone, and format for every response. CLAUDE.md adds project context and conventions as a user message. Use styles for how Claude communicates, CLAUDE.md for what Claude knows about your project.
How do I create a custom output style?
Create a Markdown file in .claude/output-styles/ with YAML frontmatter and instruction text. Add name, description, and keep-coding-instructions fields. Switch to it via /config and run /clear to activate.
Does the Proactive style skip permission prompts?
No. Proactive changes Claude’s willingness to propose and attempt actions, but it does not change your permission settings. You still see every prompt your configuration requires. Use auto permission mode separately to skip prompts.
When should I set keep-coding-instructions to true?
Set it to true whenever the style is used for software engineering tasks. This preserves Claude’s change scoping, comment writing, and verification behaviors. Set it false only for non-coding roles like writing or analysis.
Why is my custom output style not showing up in the config menu?
Check the directory path. It must be exactly .claude/output-styles/ with a hyphen, not underscores or alternative names. Verify the frontmatter delimiters are correct. Restart Claude Code if the file was added during a session.
Output styles give you direct control over how Claude Code communicates across every conversation. The four built-in options cover most needs, and custom styles let you define exactly the role, tone, and format you want. Pick the right style for the task, clear the session after switching, and use keep-coding-instructions to preserve engineering behavior when coding.