


CLI reference for Claude Code puts every command, flag, and configuration file at your fingertips. The claude binary handles interactive sessions, headless automation, background agents, and enterprise policy from one entry point. This guide walks the full command surface so you can configure, script, and troubleshoot without guesswork.

CLI reference: What You’ll Learn
This CLI reference covers the claude binary, every major flag, and the five-level settings hierarchy that governs how Claude Code runs. You will pick up session management, headless execution, permission controls, and enterprise configuration patterns that scale from solo projects to large teams.
Whether you are automating a CI pipeline or enforcing policy across hundreds of machines, these commands form the backbone of your daily workflow. The examples in this CLI reference are copy-ready and drawn from the official Claude Code CLI documentation.
The claude Binary and Core Commands
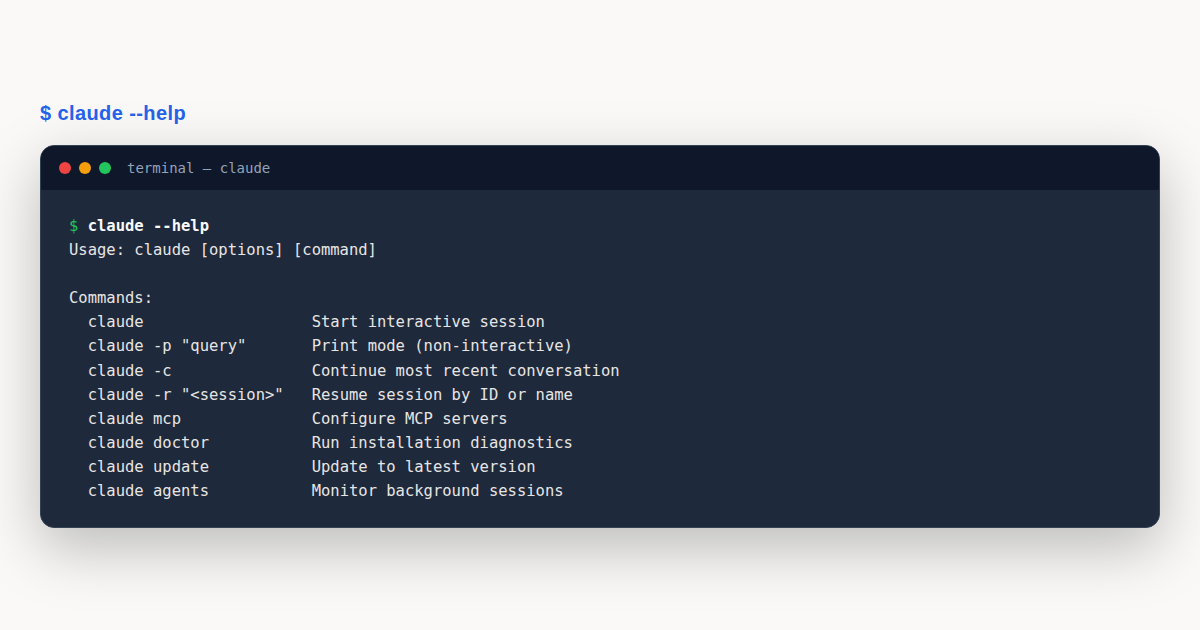
Every interaction with Claude Code starts with the claude binary. At its simplest, typing claude with no arguments launches an interactive session in your current directory. The binary reads your project context, picks up any CLAUDE.md files, and drops you into a conversation prompt.
You can pass an initial prompt as a positional argument. This skips the empty prompt and sends your question immediately, which saves a round trip when you already know what you want to ask:
claude "explain the architecture of this project"For quick one-shot queries that do not need a persistent session, the -p flag sends a prompt, prints the response, and exits. This is the foundation of headless automation and the entry point most scripts rely on:
claude -p "summarize the changes in the last commit"You can also pipe content into the binary. Claude Code reads from stdin and treats the piped text as context for the prompt you supply. This is how you feed logs, diffs, file contents, or any text from your shell into a query:
cat error.log | claude -p "what caused this crash?"Beyond the basic entry point, the binary supports a family of subcommands. Each subcommand targets a specific operational task, from authentication to diagnostics. Here are the ones you will reach for most often in day-to-day work:
claude updateinstalls the latest version of the binary.claude doctorprints installation health and settings diagnostics without starting a session.claude auth loginsigns you in. Use--consolefor API billing or--ssofor single sign-on.claude auth statusshows whether you are logged in, exiting 0 if authenticated and 1 if not.claude mcpmanages Model Context Protocol server configuration.claude agentsopens the agent view for dispatching parallel background sessions.claude setup-tokengenerates a long-lived OAuth token for CI and scripts.claude install [version]installs or reinstalls a specific binary version, acceptingstableorlatest.
If you mistype a subcommand, Claude Code suggests the closest match and exits. Typing claude udpate prints Did you mean claude update? instead of starting a session with your typo as a prompt. This small detail saves real debugging time.
CLI reference: Essential Flags
Flags modify how the claude binary behaves for a single invocation. They override settings without touching your configuration files, which makes them ideal for scripting and experimentation. Note that claude --help does not list every flag, so a flag missing from help output does not mean it is unavailable.
The --model flag selects which model the session uses. You can pass a model alias like sonnet or opus, or a full model identifier. This is the quickest way to switch models for a specific task without changing your settings file:
claude --model sonnet "refactor this function for readability"The --print flag (shorthand -p) runs Claude Code in headless mode. It sends the prompt, waits for the response, prints it to stdout, and exits without entering an interactive session. This flag is what you want in CI pipelines and shell scripts.
The --continue flag (shorthand -c) picks up the most recent conversation in the current directory. Combine it with -p for headless continuation, which lets a script resume where your last session left off:
claude -c -p "check for type errors in the files we just edited"The --resume flag (shorthand -r) resumes a specific session by ID or by a name you previously assigned. This lets you jump back into a conversation you started hours or days ago without scrolling through a list of unnamed sessions:
claude -r "auth-refactor" "finish the login flow we started"The --permission-mode flag controls how Claude Code asks for approval before running tools. Common values include default, plan, auto, and bypassPermissions. The mode you choose determines whether the session pauses for confirmation on each tool call or runs with varying degrees of autonomy.
The --allowedTools flag pre-approves specific tools so they execute without prompting. You pass tool patterns using the same syntax as permission rules in settings files. This CLI reference pattern keeps your automation flowing without manual approvals:
claude --allowedTools "Bash(git log *)" "Bash(git diff *)" "Read"The --settings flag points to a custom settings file for the session. This is useful when you maintain different configuration profiles for different projects or environments, such as a restrictive CI profile and a permissive local profile:
claude --settings ./profiles/ci.json -p "run the test suite"The --mcp-config flag loads an MCP server configuration from a file. This lets you bring custom tools into a session without modifying your persistent MCP setup. The --bare flag starts a minimal session that skips auto-discovery of hooks, skills, plugins, MCP servers, auto memory, and CLAUDE.md files, giving you faster startup for scripted calls:
claude --bare -p "list all TODO comments in the src directory"The --verbose flag increases output detail, which helps when debugging unexpected behavior. The --add-dir flag grants the session access to additional working directories beyond the current one. Note that added directories grant file access but most .claude/ configuration in them is not discovered:
claude --add-dir ../shared-lib ../configThe --system-prompt flag replaces the default system prompt entirely, while --append-system-prompt adds text to the end of the default prompt without replacing it. The append variant is safer because it preserves the built-in instructions that keep Claude Code behaving correctly:
claude --append-system-prompt "Always respond in TypeScript" -p "write a debounce function"For dynamic subagent definitions on the fly, the --agents flag accepts a JSON object describing custom agents. This is handy for one-off scripts that need a specialized reviewer or tester without creating permanent agent files on disk:
claude --agents '{"reviewer":{"description":"Reviews code","prompt":"You are a strict code reviewer"}}' -p "review src/auth.ts"Interactive and Headless Modes
Claude Code operates in two fundamental modes: interactive and headless. Interactive mode opens a conversation where you type prompts, review responses, approve tool calls, and iterate in real time. Headless mode, triggered by the -p or --print flag, sends a single prompt and returns the result without human interaction. Your CLI reference for both modes starts here.
Interactive mode is what you use for exploratory work. You start a session, ask questions, let Claude read and edit files, and guide the conversation as it evolves. The session persists in your local history, so you can resume it later with the continuation flags covered elsewhere in this CLI reference.
Headless mode shines in automation. You call claude -p from a shell script, a CI pipeline, a git hook, or any context where a human is not sitting at the terminal. The output goes to stdout, which means you can pipe it, redirect it, or parse it with standard Unix tools like jq or grep.
# Generate a commit message in a git hook
claude -p "write a conventional commit message for the staged changes" | git commit -F -
Headless mode also supports structured output. You can ask for JSON, parse it with jq, and feed it into the next step of your pipeline. The key constraint is that headless sessions exit after the response, so any follow-up requires a new invocation or session continuation with -c.
When you pipe content into a headless call, Claude Code treats the piped data as context for the prompt. This is how you analyze logs, diff output, file contents, or any text that lives in your shell environment:
git diff HEAD~3 | claude -p "summarize these changes for a release notes draft"One important detail for enterprise users: headless sessions with -p skip the security approval dialogs that interactive sessions show for managed settings. If your organization pushes hooks or environment variables through server-managed settings, those apply silently in headless mode without prompting the user.
Session Continuation and Resumption
Conversations in Claude Code are persistent. Every session is stored locally with a unique ID, and you can return to any previous session without retyping context. The -c and -r flags are the two primary tools covered in this CLI reference for picking up where you left off.
The --continue flag resumes the most recent conversation in the current working directory. It is the fastest way to return to a session after stepping away or closing your terminal, because it requires no session ID or name lookup:
claude -cYou can combine -c with a new prompt to continue the conversation with a specific instruction. This avoids entering the interactive session just to type one more message, which is particularly useful in scripts that chain follow-up queries:
claude -c "now add tests for the function we just wrote"The --resume flag is more targeted. It resumes a specific session by its ID or by a name you assigned to it. Session IDs are short hex strings that you can find in the session list. Named sessions are easier to work with because you choose a human-readable label when you create them:
# Resume by name
claude -r "auth-refactor" "fix the failing test in login.spec.ts"

# Resume by ID
claude -r "7c5dcf5d" "what did we decide about the token refresh strategy?"
For a headless continuation, pair -c or -r with -p. The session history loads, your prompt runs against the full prior context, and the response prints to stdout. This CLI reference pattern is how CI jobs build on earlier analysis without storing context externally:
claude -c -p "are there any remaining TODO items from our last session?"Sessions are scoped to the directory where they started, which keeps your history organized by project. The -c flag only finds conversations that began in your current working directory, while -r can target any session if you know its ID or name.
Permission Control from the Command Line
Permissions are the safety rails that govern what Claude Code can do without asking. The CLI gives you several flags to configure permissions per session, which is especially useful in automation where no one is available to approve tool calls interactively.
The --permission-mode flag sets the baseline behavior for the session. In default mode, Claude asks before running potentially destructive tools. In plan mode, it plans first and only acts when you approve the plan. In auto mode, a classifier decides which actions are safe to run without prompting.
The bypassPermissions mode skips all permission checks entirely. Use it with caution and only in trusted, isolated environments like a throwaway container. You can add it to the Shift+Tab mode cycle without starting in it by passing --allow-dangerously-skip-permissions:
claude --permission-mode plan --allow-dangerously-skip-permissionsThe --allowedTools flag pre-approves specific tools for the session. Each entry is a pattern that matches the tool-call syntax. This is how you grant access to specific bash commands, file reads, or other operations without giving blanket approval to everything:
claude --allowedTools "Bash(npm test *)" "Bash(npm run lint)" "Read" "Edit"The --add-dir flag grants file access to directories outside the current working directory. Note that it grants file access but does not discover configuration from those directories. Most .claude/ settings in added directories are not picked up by the session. To persist additional directories, set permissions.additionalDirectories in your settings file:
claude --add-dir ../monorepo/packages/*Permission rules can also be configured in settings files, which is the better approach for rules you want to keep across sessions. The CLI reference distinction matters here: CLI flags are for session-specific overrides, testing, and one-off automation runs. For persistent rules, use the permissions.allow and permissions.deny arrays in your settings JSON.
The Five-Level Settings Hierarchy
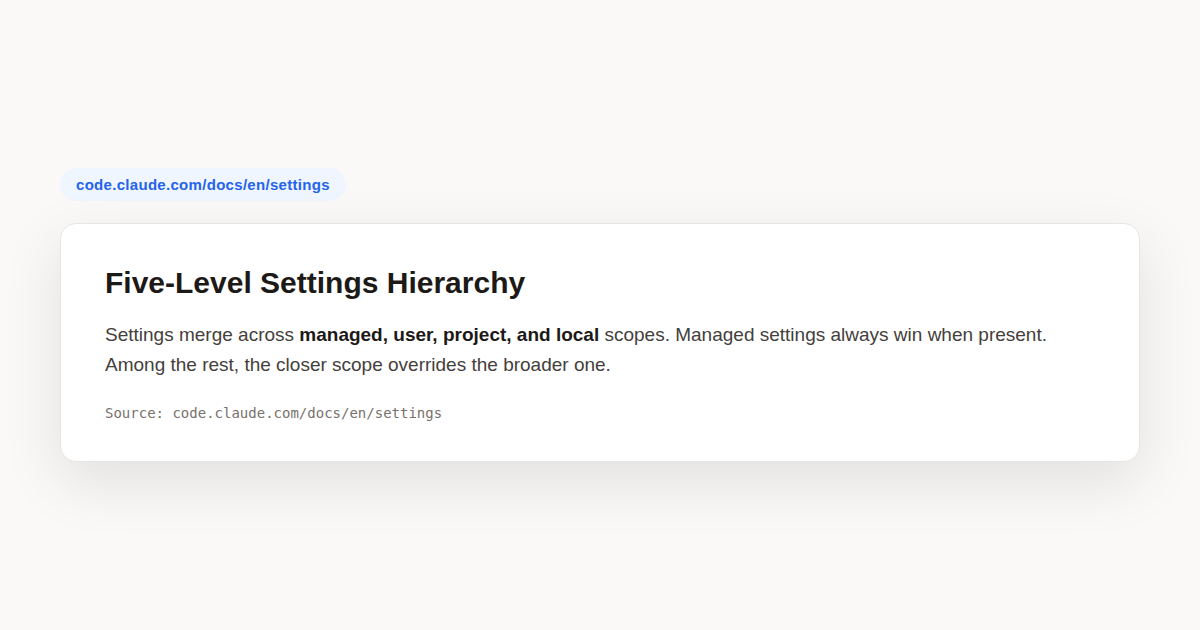
Claude Code resolves configuration through a five-level hierarchy. Each level can override the one below it, and the managed level at the top cannot be overridden by anything. Understanding this hierarchy is essential to your CLI reference knowledge and the key to configuring Claude Code correctly for yourself, your team, and your organization.
The levels, from highest to lowest priority, are as follows:
- Managed settings, delivered by IT or server-managed policies. These always win and cannot be overridden by any other source.
- Command-line arguments, which are temporary overrides for a single session that disappear when the session ends.
- Local settings in
.claude/settings.local.json. These are personal overrides for a specific project and are not committed to version control. - Project settings in
.claude/settings.json. These are shared with everyone who works on the repository and are committed to git. - User settings in
~/.claude/settings.json. These apply to you across every project on your machine.
When the same key appears at multiple levels, the higher level wins. If your user settings enable a feature and your project settings disable it, the project value applies for sessions in that repository. If managed settings address the same key, nothing else matters.
Permission rules behave differently from regular settings. Instead of overriding, they merge across levels. A deny rule in any scope applies on top of allow rules from other scopes. This design ensures that a security policy set by an administrator always takes effect, even if a user or project tries to allow the same operation.
Command-line flags sit between managed and local settings. They override everything except managed policy. This means a flag like --model works unless a managed setting has locked the model, in which case the flag is silently ignored or rejected with a warning.
Scopes apply to many Claude Code features beyond settings. Subagents, MCP servers, plugins, and CLAUDE.md files all follow the same user, project, and local split. This consistency means you can reason about configuration once and apply the same mental model everywhere you work.
Settings Files and Their Locations
The settings.json file is the primary mechanism for configuring Claude Code. It uses a JSON format with a published schema that editors like VS Code and Cursor can validate against. Adding the $schema key gives you autocomplete and inline validation as you type. This CLI reference section walks through each file location.
User settings live at ~/.claude/settings.json and apply across every project on your machine. This is where you put personal preferences like your default model, output style, and editor integration settings. On Windows, the ~/.claude path resolves to %USERPROFILE%.claude.
Project settings live at .claude/settings.json inside the repository root. These settings are committed to version control and shared with every collaborator on the project. Use this file for team-shared permission rules, MCP servers, and hooks that everyone should have configured identically.
Local settings live at .claude/settings.local.json. Claude Code creates this file with a gitignore entry so it stays personal to you. Use it for machine-specific overrides, experimental configurations, and personal preferences that only apply to this project on this computer. Permission allow rules in this file take effect without the workspace trust step that project rules require.
Here is a practical settings file with permission rules, environment variables, and the schema key that enables editor validation:
{
  "$schema": "https://json.schemastore.org/claude-code-settings.json",
  "permissions": {
    "allow": [
      "Bash(npm run lint)",
      "Bash(npm run test *)",
      "Read(~/.zshrc)"
    ],
    "deny": [
      "Bash(curl *)",
      "Read(./.env)",
      "Read(./.env.*)",
      "Read(./secrets/**)"
    ]
  },
  "env": {
    "CLAUDE_CODE_ENABLE_TELEMETRY": "1",
    "OTEL_METRICS_EXPORTER": "otlp"
  }
}
The ~/.claude.json file is separate from settings.json. It stores your OAuth session, MCP server configurations, per-project state like allowed tools and trust settings, and various caches. You generally do not edit this file by hand. Project-scoped MCP servers live in .mcp.json at the repository root.
Claude Code watches your settings files and reloads them when they change. Most edits apply to the running session without a restart, including permissions, hooks, and credential helpers. A few keys, like model and outputStyle, are read once at startup and require a restart or a mid-session command to change.
CLI reference: Managed and Enterprise Settings
Managed settings are the top tier of the hierarchy. They cannot be overridden by user, project, local, or command-line settings. Organizations use them to enforce security policies, compliance requirements, and standardized tooling across all users. This CLI reference section covers the three delivery mechanisms available.
The first mechanism is server-managed settings. These are configured in the claude.ai admin console under Admin Settings, then Claude Code, then Managed Settings. Claude Code clients fetch them automatically when users authenticate with an organization OAuth login or a directly configured API key. The fetch happens at startup and polls hourly during active sessions.
Server-managed settings are ideal for organizations that do not have mobile device management infrastructure, or that need to manage users on unmanaged devices. They require a Claude for Teams or Claude for Enterprise plan and network access to api.anthropic.com. An example configuration enforces a deny list and blocks permission bypass:
{
  "permissions": {
    "deny": [
      "Bash(curl *)",
      "Read(./.env)",
      "Read(./.env.*)",
      "Read(./secrets/**)"
    ],
    "disableBypassPermissionsMode": "disable"
  },
  "allowManagedPermissionRulesOnly": true
}
The second mechanism is MDM and OS-level policies. On macOS, settings are delivered through the com.anthropic.claudecode managed preferences domain via configuration profiles deployed in Jamf, Kandji, or similar MDM tools. On Windows, settings go through the HKLMSOFTWAREPoliciesClaudeCode registry key with a Settings value containing JSON, deployed via Group Policy or Intune.
The third mechanism is file-based managed settings. A managed-settings.json file is deployed to a system directory that varies by platform:
- macOS:
/Library/Application Support/ClaudeCode/ - Linux and WSL:
/etc/claude-code/ - Windows:
C:Program FilesClaudeCode
File-based managed settings also support a drop-in directory called managed-settings.d/ alongside the main file. Separate teams can deploy independent policy fragments without coordinating edits to a single shared file. Files are sorted alphabetically and merged, following the systemd convention. Use numeric prefixes like 10-telemetry.json and 20-security.json to control merge order.
Managed settings parse tolerantly. When a configuration contains an entry that fails schema validation, Claude Code strips that entry, records a warning, and enforces every remaining valid policy. A single typo cannot disable the rest of the policy. Security-enforcement fields like allowedMcpServers and allowManagedMcpServersOnly default to the most restrictive behavior when present but invalid.
For environments where even a brief unenforced window at startup is unacceptable, set forceRemoteSettingsRefresh: true in your managed settings. The CLI then blocks at startup until remote settings are freshly fetched. If the fetch fails, the CLI exits rather than proceeding without the policy. Run claude doctor on a test machine to validate the delivery before rolling it out fleet-wide:
# Validate managed policy on a test machine before deploying
claude doctor
Server-managed settings also support hooks that run shell commands. Because hooks execute code, users see a security approval dialog before they are applied. In headless mode with -p, the dialog is skipped and settings apply directly. This is important to understand when designing CI automation that relies on managed hooks.
MCP Server Configuration from the Shell
The claude mcp subcommand manages Model Context Protocol servers from the terminal. MCP servers extend Claude Code with external tools, data sources, and integrations. This CLI reference section covers the subcommands that let you add, remove, list, and authenticate MCP servers without opening the interactive /mcp panel inside a session.
For servers that require OAuth, the claude mcp login subcommand runs the OAuth flow directly from the command line. This works for HTTP, SSE, and claude.ai connector servers. Over SSH where a browser is not available, pass --no-browser to print the authorization URL instead of opening one:
claude mcp login sentry --no-browserThe command prints the URL, you open it in a browser on any device, complete the authorization, and paste the redirect URL back at the prompt. The claude mcp logout subcommand clears stored OAuth credentials for a specific server when you no longer need the integration.
You can also load MCP configuration from a file using the --mcp-config flag on the main claude command. This is useful for bringing a custom set of MCP servers into a session without modifying your persistent setup. The flag accepts a path to a JSON file describing the servers and their transport configuration.
Diagnostics, Updates, and Utility Commands
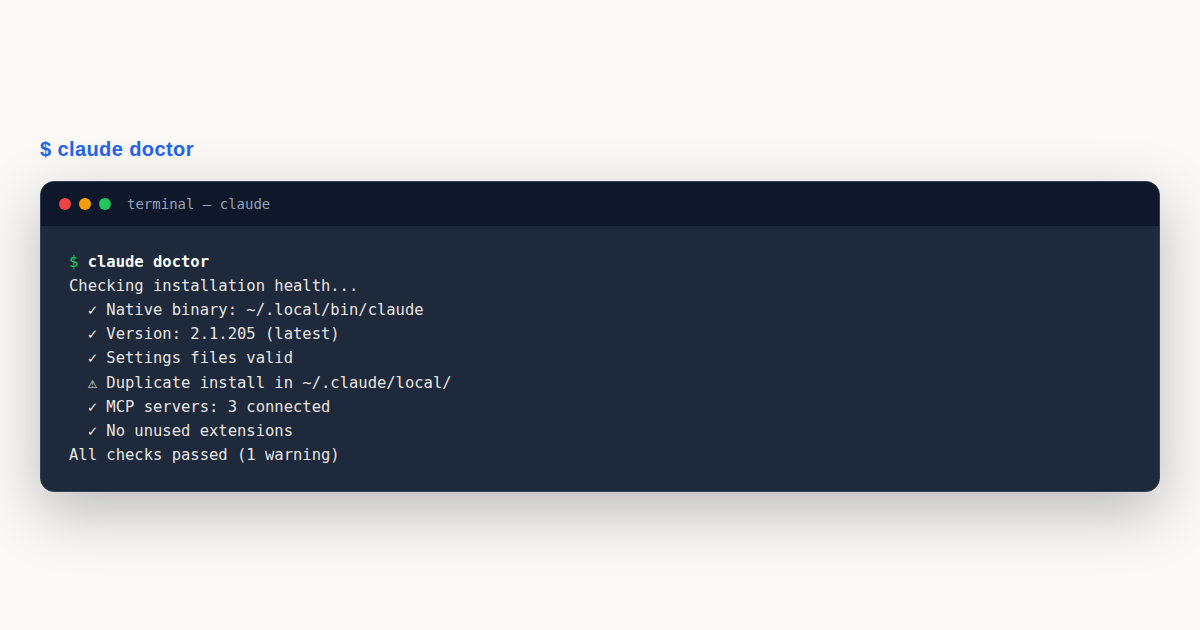
The claude doctor command is your first stop for troubleshooting. It prints read-only diagnostics covering installation health, settings file validation errors, and Remote Control eligibility. This CLI reference utility does not start a session, which means you can run it in CI or on a remote machine to verify configuration before launching real work.
The claude update command installs the latest version of the binary. For installing a specific version, use claude install with a version string like 2.1.118, or the aliases stable and latest. This is useful for pinning a known-good version across a team or rolling back if a new release introduces a regression:
claude install stable
claude install 2.1.118
The claude setup-token command generates a long-lived OAuth token for CI pipelines and scripts. It prints the token to stdout without saving it, so you capture it and store it securely in your CI secret manager. This token lets automated jobs authenticate without interactive login flows.
The claude agents command opens the agent view, where you monitor and dispatch parallel background sessions. Pass --json to print active sessions as a JSON array for scripting, or --cwd to filter by working directory. You can set defaults for dispatched sessions with flags like --permission-mode, --model, and --effort.
For background session management from the shell, the CLI reference provides a family of commands. Each targets a session by its hex ID. Here is a quick reference for the most common operations:
claude attach <id>attaches to a background session in the current terminal.claude stop <id>stops a running background session.claude rm <id>removes a session from the list. The transcript stays on disk for--resume.claude logs <id>prints recent output from a background session.claude respawn <id>restarts a session with its conversation intact, useful after a binary update.
The claude daemon subcommand manages the supervisor process that hosts background sessions. Check its health and stop it when needed:
# Check supervisor state, version, and worker count
claude daemon status

# Stop the supervisor but keep workers running for reconnection
claude daemon stop --any --keep-workers
The claude project purge command deletes all local Claude Code state for a project. This includes transcripts, task lists, debug logs, file-edit history, and prompt history. Use --dry-run to preview what gets removed before committing to the deletion:
claude project purge ~/work/legacy-app --dry-runThe claude gateway command starts a self-hosted gateway server for administrators deploying SSO and policy in front of Claude Code on cloud platforms. It requires a --config flag pointing at a gateway.yaml file. This is an advanced deployment path for organizations that need a custom control plane.
A Worked Example: Configuring a Team Project
Imagine you are setting up Claude Code for a team of eight developers working on a monorepo. You want shared permission rules, a consistent default model, and a hook that runs the linter after every file edit. Here is how you would configure it end to end using the CLI and the settings hierarchy.
Start by creating the project settings file at .claude/settings.json in the repository root. This file gets committed to git, so every team member picks it up when they clone. Add the shared permission rules, the default model, and a PostToolUse hook that fires after edits. The hook runs ESLint with the fix flag on changed files:
{
  "permissions": {
    "allow": [
      "Bash(npm run lint)",
      "Bash(npm run test *)",
      "Bash(npm run build)"
    ],
    "deny": [
      "Read(./.env)",
      "Read(./.env.*)",
      "Bash(rm -rf *)"
    ]
  },
  "model": "sonnet",
  "hooks": {
    "PostToolUse": [
      {
        "matcher": "Edit|Write",
        "hooks": [
          { "type": "command", "command": "npx eslint --fix $CLAUDE_FILE_PATHS" }
        ]
      }
    ]
  }
}
Next, tell your team to clone the repo and run claude in the project root. On first launch, Claude Code detects the project settings file and shows the workspace trust dialog. Once they approve, the permission rules and hook take effect automatically for every session in that directory.
For developers who want personal overrides, they create .claude/settings.local.json. This file is gitignored, so it never leaks into the shared repository. A developer might use it to switch to a more capable model for a complex task, or to add a personal MCP server that the rest of the team does not need:
{
  "model": "opus",
  "permissions": {
    "allow": [
      "Bash(docker compose *)"
    ]
  }
}
Now configure CI. Generate a long-lived token with claude setup-token and store it as a secret in your CI platform. In the pipeline script, run Claude Code in headless mode with bare startup to keep it fast and deterministic. Using the CLI reference patterns from earlier, pass a settings file that contains only what CI needs:
claude --bare -p "review the diff for security issues and print findings as JSON"
  --settings ./ci-settings.json
The ci-settings.json file contains a restrictive permission set and no hooks. This keeps the pipeline reproducible, because hooks can introduce side effects that vary between runs. The --bare flag skips plugin and MCP discovery, further reducing variables.
Finally, for the security team, push a managed settings policy through the admin console. This policy denies access to secret files across the entire organization and cannot be overridden by any project or user setting. Even a misconfigured repository cannot accidentally expose credentials, because the managed deny rule sits at the top of the hierarchy.
Run claude doctor on a test machine to verify that the managed policy arrives correctly and that no settings file has validation errors. The doctor command prints the source of each active setting, so you can confirm which tier each rule comes from. Once the diagnostics are clean, roll the policy out to the full team.
This setup gives you four tiers working together: user settings for personal preferences, project settings for shared team config, local settings for individual overrides, and managed settings for non-negotiable security policy. Each tier has a clear purpose and does not interfere with the others.
CLI reference: Common Mistakes to Avoid
Even experienced developers hit the same pitfalls when working with the Claude Code CLI. Here are four mistakes that cause the most friction, along with how to fix each one.
- Confusing project and local settings. Putting personal overrides in
.claude/settings.jsoninstead of.claude/settings.local.jsoncommits them to git and forces them on every teammate. Fix: keep personal configuration in the local file, which is gitignored by default when Claude Code creates it. - Forgetting that flags do not override managed policy. Passing
--model opuswhen a managed setting locks the model silently fails or gets rejected. Fix: checkclaude doctoroutput for managed settings that constrain your session before debugging why a flag appears to do nothing. - Using interactive mode in CI scripts. Running plain
claudewithout-pin a pipeline hangs forever waiting for terminal input that never arrives. Fix: always pass-pfor headless execution, and pair it with--barefor faster startup when you do not need plugins or hooks. - Ignoring the settings reload behavior. Changing
modelinsettings.jsonand expecting it to take effect mid-session without a restart. Fix: use the/modelcommand to switch models during a running session, or restart Claude Code to pick up startup-only keys likeoutputStyle.
CLI reference: Best Practices
- Keep project settings lean. Only put rules the whole team needs in
.claude/settings.json. Personal preferences go insettings.local.jsonso they do not leak into teammate environments through version control. - Use
--barefor CI and scripts. Skipping plugin, hook, and MCP discovery shaves startup time and makes headless runs deterministic, which matters when a pipeline runs hundreds of invocations per day. - Validate before deploying managed settings. Run
claude doctoron a test machine after changing managed policy or adding hooks to catch validation errors before they reach the entire organization. - Deny by default, allow specifically. Start with
denyrules for dangerous operations likerm -rfor reading.envfiles, then add targetedallowentries for the commands your workflow actually needs. - Name your sessions. When you start a long-running task, give the session a name so you can resume it with
claude -r "name"instead of hunting for a hex ID in the session list. Named sessions make context switching effortless.
CLI reference: Frequently Asked Questions
What is the difference between the -c and -r flags?
The -c flag continues the most recent conversation in the current directory. The -r flag resumes a specific session by ID or name, letting you target any past conversation regardless of which directory it started in or how recent it is.
How do I run Claude Code in a CI pipeline?
Use claude -p "your prompt" for headless execution. Generate a token with claude setup-token, store it as a CI secret, and add --bare to skip plugin and hook discovery for faster, more deterministic startup.
Can command-line flags override managed settings?
No. Managed settings sit at the top of the hierarchy and cannot be overridden by anything, including CLI flags. A flag like --model is silently ignored if a managed policy locks the model for your organization.
Where are user settings stored on disk?
User settings live at ~/.claude/settings.json and apply across all projects on your machine. On Windows, the path resolves to %USERPROFILE%.claudesettings.json. Project settings live separately in .claude/settings.json at the repo root.
How do I check if my settings configuration is valid?
Run claude doctor from the terminal. It prints installation health, settings file validation errors, and managed policy diagnostics without starting a session. It is the fastest way to verify your configuration is correct.
CLI reference for Claude Code comes down to three things: the claude binary and its flags control individual sessions, the five-level settings hierarchy governs persistent configuration, and managed settings enforce policy that nothing can override. Master these layers and you can configure, automate, and secure Claude Code at any scale.