Claude Code slash commands provide a way to control Claude directly from the prompt, including built-in commands, custom skills, plugins, and MCP prompts. Users can type / to view available commands and filter them by typing characters, with commands organized into categories like context management, session tools, and configuration.
The guide explains how to create custom skills using the .claude/skills/ directory structure, pass arguments with $ARGUMENTS, and inject live shell output with !`command` syntax. Commands range from basic utilities like /clear and /rename to advanced features like /code-review and /security-review for pre-ship reviews.
Claude Code Slash Commands. This guide to Claude Code slash commands covers the built-in commands, custom skills, plugin commands, and MCP prompts that let you control Claude directly from the prompt.
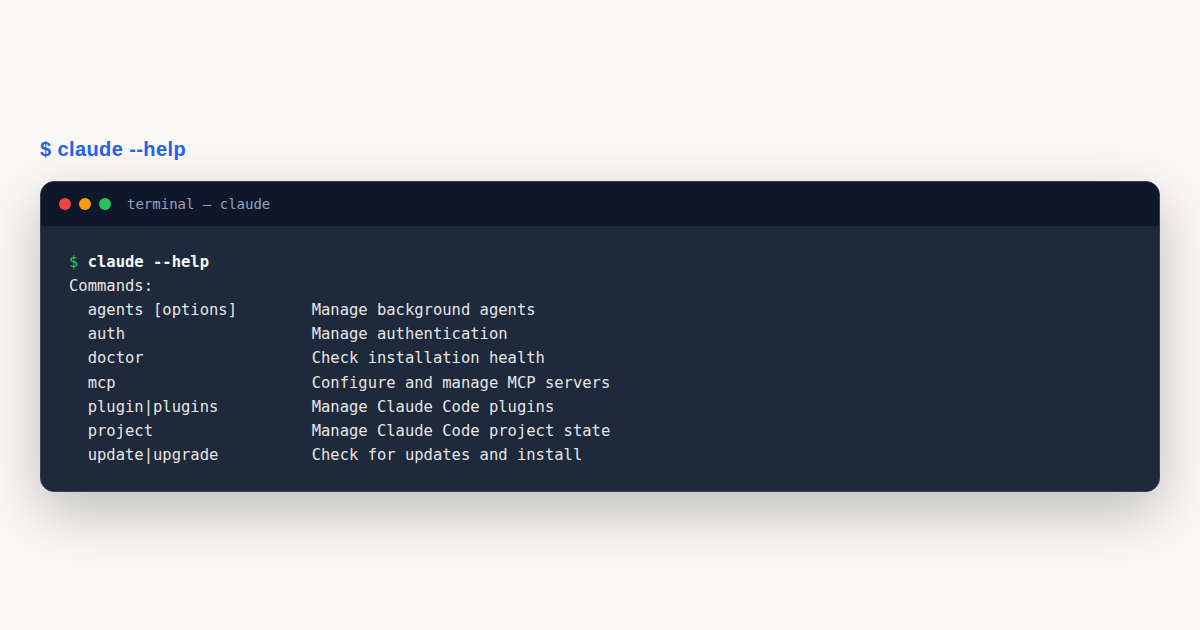
Claude Code Slash Commands: What You’ll Learn
In this guide to Claude Code Slash Commands, you’ll work through practical, hands-on steps with real examples. Claude Code Slash Commands is explained from the ground up so you can apply it immediately in your own projects.
Slash commands provide the quickest way to steer Claude Code’s behavior during an interactive session. Simply type / at any prompt to view the complete list, or type a few characters to narrow it down. This lesson covers the built-in commands you’ll rely on daily.
Discovering Commands
Type / at the prompt and a menu appears with all available commands. Start typing to filter: /co narrows to /compact, /color, /config, /context, /cost, /copy. Arrow keys navigate, Enter selects. Commands that aren’t available for your current setup are hidden automatically, so you only see what works.
New to Claude Code? Try
/powerup. It runs interactive lessons with animated demos that walk you through key features right inside the CLI.
Some commands accept arguments directly: /compact focus on the API layer, /model opus, /effort high, /rename auth-refactor. Others like /context, /cost, and /status run immediately with no arguments.
/compact focus on the payment serviceCommand Categories
Built-in commands group into a few categories. Knowing the categories helps you find the right command without memorizing all of them.
Context Management
These commands control how much of the conversation Claude can see.
/context: shows a visual grid of your context usage/compact: compresses the conversation. Pass instructions to control what’s preserved:/compact keep the migration plan, drop the debugging/clear: starts completely fresh
Session Tools
These commands let you manage and revisit work.
/rename my-feature: gives the session a readable name/resume: picks up a previous session/branch: creates a parallel conversation to explore an alternative without losing your current state/rewind: rolls back to an earlier point./undois an alias for/rewind./export: saves the session to a file or clipboard/recap: generates a one-line summary of what happened in the session. Also runs automatically when you return to the terminal after stepping away.
Configuration
These commands adjust Claude’s behavior mid-session.
/model: switches between available models such as Sonnet, Opus, Haiku, and other aliases likebestoropusplan/effort: sets reasoning depth:low,medium,high,xhigh,max(session-only), orauto/permissions: manages what Claude can do without asking/config: opens the settings menu/theme(new in v2.1.118): creates and switches between named custom themes. Themes are stored as JSON files in~/.claude/themes/and can also be hand-edited directly./tui: switches between classic and flicker-free fullscreen rendering mid-conversation. Also available as atuisetting./focus: toggles focus view for distraction-free input./fewer-permission-prompts: scans your recent transcripts for common read-only Bash and MCP tool calls, then proposes an allowlist to add to.claude/settings.jsonto reduce future permission prompts.
Diagnostics
These commands help when something isn’t working.
/cost: shows session cost, duration, code changes, and token usage/usage-credits(new in v2.1.144): view and manage usage credits on your account. Renamed from/extra-usage; the old name still works./status: shows version, model, and account info/doctor: checks installation health/diff: opens an interactive viewer for uncommitted changes, useful for reviewing what Claude has done before committing
Pre-Ship Reviews
These commands check your work before it leaves your branch.
/code-review: reviews the current diff for correctness bugs and reports findings without editing files. Accepts an effort level (/code-review highreturns broader coverage;/code-review lowreturns fewer, higher-confidence findings) and--commentto post findings as inline comments on the current GitHub PR. Pass a path or PR reference to review a specific target. This is the bundled skill (formerly/simplifybefore v2.1.147);/code-review --fixapplies the findings to your working tree. From v2.1.154,/simplifyis a separate cleanup-only skill that applies fixes without hunting for bugs. Use/code-reviewto find bugs./code-review ultra: runs a deep, multi-agent code review in a cloud sandbox using parallel analysis and critique. With no arguments it reviews your current branch; pass a PR number (/code-review ultra 123) to fetch and review a GitHub PR./ultrareviewis an alias. Pro and Max include a few free runs, after which it draws on usage credits./review: read-only deeper pass on the change set/security-review: security-focused review of pending changes
/context
/compact keep the auth refactor plan
/model opus
/effort high
/cost
/code-review high
/code-review --comment
Real-World Code Examples: Slash Commands
Example 1: Git Commit Command
A slash command that automatically creates conventional commits using live git context:
---
allowed-tools: Bash(git add:*), Bash(git status:*), Bash(git commit:*), Bash(git diff:*)
argument-hint: [message]
description: Create a git commit with context
---

## Context

- Current git status: !`git status`
- Current git diff: !`git diff HEAD`
- Current branch: !`git branch --show-current`
- Recent commits: !`git log --oneline -10`

## Your task

Based on the above changes, create a single git commit.
If a message was provided via arguments, use it: $ARGUMENTS
Otherwise, analyze the changes and create an appropriate commit message
following conventional commits format (feat:, fix:, docs:, refactor:, test:, chore:).
Example 2: Code Optimization Analyzer
A skill that reviews code for performance issues and suggests optimizations:
---
description: Analyze code for performance issues and suggest optimizations
---

# Code Optimization

Review the provided code for the following issues in order of priority:

1. Performance bottlenecks - identify O(n-squared) operations, inefficient loops
2. Memory leaks - find unreleased resources, circular references
3. Algorithm improvements - suggest better algorithms or data structures
4. Caching opportunities - identify repeated computations
5. Concurrency issues - find race conditions or threading problems

Format your response with:
- Issue severity (Critical/High/Medium/Low)
- Location in code
- Explanation
- Recommended fix with code example
Example 3: Pull Request Preparation
A comprehensive slash command for PR preparation with restricted tool access:
---
description: Clean up code, stage changes, and prepare a pull request
allowed-tools: Bash(git add:*), Bash(git status:*), Bash(git diff:*), Bash(npm test:*), Bash(npm run lint:*)
---

# Pull Request Preparation Checklist

1. Run linting: prettier --write .
2. Run tests: npm test
3. Review git diff: git diff HEAD
4. Stage changes: git add .
5. Create commit message following conventional commits
6. Generate PR summary including what changed, why, testing, and impacts
Built-in Claude Code Slash Commands Reference
The built-in Claude Code Slash Commands cover the workflow from project setup through session management, diagnostics, and review. Knowing which command does what is the difference between a smooth session and a lot of back-and-forth. The list below is the working reference you can return to; Claude Code Slash Commands are invoked by typing the command at the prompt and pressing Enter, and most of them also accept arguments.
| Command | What it does |
|---|---|
/help | Lists every available command, including plugin and custom ones. |
/clear | Wipes the current conversation context so the next task starts clean. |
/compact | Summarizes the conversation so far to reclaim context window space. |
/init | Generates a starter CLAUDE.md from the current project structure. |
/config | Opens the settings UI for model, update channel, and feature flags. |
/status | Shows version, account, model, context usage, and working directory. |
/cost | Reports token usage and spend for the current session. |
/context | Lists the files and rules currently loaded into context. |
/plan | Switches to planning mode for read-only analysis before edits. |
/review | Runs a pre-ship review over the current diff or a named range. |
/agents | Creates and manages subagents for specialized, repeatable tasks. |
/mcp | Lists MCP servers and the tools each one exposes. |
/permissions | Inspects and edits which tools are auto-approved or denied. |
/memory | Edits the CLAUDE.md files loaded for the current project. |
/model | Switches the underlying model for the session. |
/login, /logout | Manage the authenticated account. |
/resume | Resumes a previous session by ID or from a list. |
/export | Exports the conversation to a file for sharing or archival. |
/add-dir | Adds another directory to the session’s working set. |
/ide, /terminal-setup | Connect the IDE extension and tune the integrated terminal. |
/doctor | Validates install, MCP servers, and settings files. |
/hooks | Configure hooks that run on session events. |
/output-style | Switches the response formatting style. |
/release-notes | Shows the changelog for the installed version. |
/bug | Opens a structured bug report template. |
Plugin and custom commands appear in the same /help list once they are installed, which is one reason Claude Code Slash Commands scale well beyond the built-in set. Every team eventually builds a small library of project-specific commands on top of this baseline.
Claude Code Slash Commands vs Skills vs Subagents
Claude Code Slash Commands, skills, and subagents solve overlapping but distinct problems, and picking the right one keeps your setup clean. Claude Code Slash Commands are the invocation layer: anything you type with a leading / is a slash command, whether it is built-in, provided by a plugin, or defined by you. A skill is the modern packaging format for a reusable capability, with a SKILL.md front matter, optional scripts, and a directory layout under .claude/skills/. A subagent is a separate context that runs a task with its own conversation window and tool permissions, created through /agents.
Use Claude Code Slash Commands when you want a short trigger for an action you run often: format a commit, generate a test skeleton, run a project-specific review. Use a skill when that action needs more than a prompt: bundled reference files, helper scripts, or a multi-step procedure documented in SKILL.md. Use a subagent when the task is expensive enough to deserve its own context window so it does not pollute the main conversation, such as a long-running refactor or a deep research pass.
The migration path from the legacy command format to skills is gradual. A legacy command lived in .claude/commands/name.md and was automatically exposed as /name. The skill format is richer: .claude/skills/name/SKILL.md with a YAML header describing when the skill applies, alongside any scripts or references the skill needs. Both still show up as Claude Code Slash Commands at the prompt, so callers do not need to know which packaging format is underneath.
Passing Arguments to Claude Code Slash Commands
Arguments are what turn Claude Code Slash Commands from shortcuts into composable tools. The full argument string the user typed after the command name is available inside the command body as $ARGUMENTS, and individual positional arguments are available as $1, $2, and so on. This means a command can either consume the raw string as a single prompt fragment or parse it positionally, depending on what makes sense for the workflow.
Three patterns cover most real command bodies. The first is the passthrough, where the command template ends with $ARGUMENTS so the user’s text is appended verbatim to a fixed instruction; this is how most review and commit commands work. The second is the positional pattern, where the template references $1 for a filename and $2 for an output format, which suits commands that build structured artifacts. The third is the shell-capture pattern, where $(...) or @file injects live shell output or file contents into the prompt, so Claude Code Slash Commands can reason about the current state of the repository rather than a static snapshot.
Quoting matters when the argument contains spaces. Because $ARGUMENTS preserves the raw string, a command that forwards it into a shell call must quote it; a command that forwards it into a natural-language prompt usually does not need quoting. When you design Claude Code Slash Commands for a team, document the expected argument shape in the command’s opening comment so the next caller knows whether to pass a file path, a free-form prompt, or a structured key-value pair.
Claude Code Slash Commands in Automated Workflows
Claude Code Slash Commands are not limited to interactive sessions; they also slot into automation through print mode. Running claude -p with a slash command in headless mode executes the command once and exits, which is exactly what CI pipelines need. Piping its output through --output-format json gives a machine-readable result that downstream steps can parse. This turns Claude Code Slash Commands into building blocks for git hooks, pull-request automation, and nightly checks.
A common pattern is a pre-merge review command that runs /review over the diff between the target branch and the feature branch, emits JSON, and fails the CI step if the review flags blocking issues. Another is a release-notes command that summarizes merged pull requests since the last tag and writes the result into a changelog file. Because Claude Code Slash Commands share the same definitions across interactive and headless modes, you develop and test the command in a session and then deploy the same command in CI without changes.
Hooks extend this further by triggering Claude Code Slash Commands on events rather than on explicit invocation. A PostToolUse hook can run a formatting command after every file edit; a Stop hook can run a review command at the end of a session. The combination of hooks for timing and Claude Code Slash Commands for behavior is how mature setups encode their team’s working agreements directly into the tool.
Slash Commands and the Context Budget
Every Claude Code Slash Command that loads files or runs tools consumes part of the context window, and managing that budget is what keeps long sessions fast. /context is the inspection tool: it shows which files, rules, and prior turns are currently loaded, along with an estimate of how much headroom remains. Running it before a heavy task tells you whether to /compact first or to /clear and start fresh.
/compact reclaims space by summarizing the conversation into a shorter form, keeping the key decisions and discarding the intermediate steps. It is the right choice when the session has accumulated useful context you want to preserve. /clear is the right choice when the current task is done and the next task is unrelated; starting clean prevents stale instructions from a previous task bleeding into the new one. Claude Code Slash Commands that load large files, such as a review over a big diff, should generally be run after a /clear so they get the full window to work with.
The discipline of clearing between unrelated tasks is the single highest-leverage habit for Claude Code Slash Commands users. A session that mixes three unrelated tasks in one context window produces worse results on each than three focused sessions would, because the model has to hold competing instructions at once. Treat /clear the way you treat committing between features: a small cost that prevents large confusion.
Designing a Custom Command Library for Your Team
Once a team standardizes on Claude Code Slash Commands, a small shared library of custom commands emerges, and a little design discipline pays off. The first decision is where the commands live. Commands that the whole team should use belong in .claude/commands/ (or .claude/skills/ for the richer skill format) inside the repository, so they are version-controlled and reviewed through pull requests. Commands that are personal belong in ~/.claude/commands/ and never touch the repo. Keeping this boundary clean is what lets Claude Code Slash Commands scale across a team without becoming a grab bag.
Naming conventions matter more than they seem. A consistent prefix scheme, such as /team-review-* for review commands or /team-release-* for release automation, groups related Claude Code Slash Commands together in the /help list and signals scope at a glance. Avoid one-letter names even for personal commands; a name like /r is fast to type but opaque to anyone else who inherits the setup, including future you.
Documentation lives inside the command file itself, in the opening comment. Each custom command should explain what it does, what arguments it expects, and what it produces, in two or three lines. This is the contract the command offers its callers, and it is what makes the difference between Claude Code Slash Commands that anyone can pick up and ones that only the author understands. When a command grows beyond a simple template, it is usually a signal to graduate it to a skill with its own SKILL.md and reference files.
Reviewing a new command in a pull request is where the team agrees on behavior. A good command PR includes the command file, a short note on why it is needed, and an example invocation with its expected output. Reviewers check that the command does not duplicate an existing one, that its tool calls are safe under the project’s permission mode, and that its argument shape is consistent with the rest of the library. Over time this review cadence builds a shared vocabulary of Claude Code Slash Commands that the whole team trusts.
Onboarding a new team member is straightforward once the library exists: they clone the repo, and every team command is immediately available in their /help list. A short walkthrough of the five most-used commands is usually enough to get someone productive. This is one of the quiet wins of investing in Claude Code Slash Commands as a shared artifact rather than a personal one: the onboarding cost falls over time instead of rising.
Claude Code Slash Commands Across CLI, IDE, and Web
Claude Code Slash Commands are designed to work across every surface the assistant runs on, and understanding the small differences between surfaces helps you pick the right one for each task. In the CLI, Claude Code Slash Commands are the primary interaction: you type them at the prompt, they run, and the result appears inline. The terminal is where the full command set, including custom and plugin commands, is always available.
In the IDE extensions (VS Code, JetBrains, and the VS Code forks), Claude Code Slash Commands are available inside the integrated chat panel and behave the same way, with a couple of additions. The IDE context lets a command reference the file you have open or the selection you have highlighted, which makes review and refactor commands feel more integrated. The IDE surface is the right choice for tasks that sit between reading code and editing it, because the diff view and file navigation are right there.
The desktop app and the web preview bring their own tradeoffs. The desktop app gives you visual diffs and a more guided interface, which suits longer sessions and reviewers who prefer a GUI over a terminal. The web preview runs on cloud VMs, which means you can run Claude Code Slash Commands from a browser without any local install, at the cost of not having direct access to your local filesystem. For a quick task from a machine where you cannot install the CLI, the web surface is convenient; for anything that touches local files, the CLI or IDE is the better fit.
The commands themselves are portable across these surfaces because the definitions live in files (.claude/commands/, .claude/skills/, plugin manifests) rather than in a surface-specific store. A command you write for the CLI works in the IDE and the desktop app without changes, and plugin-provided Claude Code Slash Commands are available everywhere the plugin is installed. This portability is why investing in a command library pays off: the work is done once and reused across every surface the team uses.
One practical note: some commands depend on tools or files that exist only in a specific environment. A command that shells out to a binary available only in your CI image will not work from a local IDE session. Documenting these dependencies in the command’s opening comment, and providing a graceful fallback message when a dependency is missing, keeps Claude Code Slash Commands from failing silently when they cross surface boundaries.
A Worked Example: Building a Release-Notes Command
Walking through one real Claude Code Slash Commands build end to end shows how the pieces fit together. The goal is a /team-release-notes command that summarizes the pull requests merged since the last tag and drafts a changelog entry. This is a common need, and it exercises every part of the command format: arguments, shell capture, and a structured prompt.
The command file lives at .claude/commands/team-release-notes.md. Its opening comment documents the contract: the command takes one optional argument, the previous tag (defaulting to the most recent tag on the branch), and produces a markdown changelog draft grouped by category. The body of the command first captures the git log between the previous tag and HEAD using a shell call, then asks the assistant to group the commits into Added, Changed, and Fixed sections based on the pull-request titles, and to write the result as a single markdown block.
Argument handling is the first detail to get right. The command references $1 for the optional tag, with a fallback to $(git describe --tags --abbrev=0) so the command works whether or not the caller passes a tag. Because the argument flows into a shell call, it is quoted to defend against tags that contain characters the shell would interpret. This quoting pattern is the one most teams get wrong on their first Claude Code Slash Commands build, and it is worth reviewing carefully in the PR that adds the command.
The shell capture is what makes the command useful. By injecting the actual git log into the prompt, the command asks the assistant to reason about real commits rather than a static example. The same pattern works for any command that needs live repository state: a diff for review, a test failure log for debugging, a file list for scaffolding. Claude Code Slash Commands that read live state are dramatically more useful than ones that only emit a fixed prompt.
The prompt itself is where the command’s quality lives. A vague prompt like “summarize these commits” produces a vague changelog; a specific prompt that names the categories, asks for one line per entry, and tells the assistant to skip merge commits produces a clean result that needs minimal editing. Writing the prompt well is the same skill as writing any other instruction for the assistant, and Claude Code Slash Commands that invest in the prompt pay off every time the command runs.
Once the command works, the finishing touches are what make it a good team citizen. The command writes its draft to stdout so the caller can redirect it into a file, the opening comment shows two example invocations, and a short note explains that the command expects to be run from the repository root. These touches take a minute to add and they are the difference between Claude Code Slash Commands that get adopted across the team and ones that sit unused because no one remembers how to call them. Hooking the command into the release process, so it runs automatically when a new tag is pushed, closes the loop and turns a manual draft into an automated step.
Claude Code Slash Commands and Permissions
Every Claude Code Slash Command runs under the session’s current permission mode, which means the safety story for commands is the same as for any other action. A command that only reads files is safe under any mode; a command that edits files or runs shell calls is gated by whatever the session allows. Knowing how Claude Code Slash Commands interact with permissions is what lets you run powerful commands without removing the safety net that catches mistakes.
The allow-list is the primary tool for shaping this. By adding a specific tool call to the project’s allowed-tools list, you let that call proceed without a prompt, which is the right setting for commands the team has reviewed and trusts. Claude Code Slash Commands that need to run the test suite, for example, benefit from having the test command on the allow-list, so the command completes without an approval prompt on every run. Commands that are run less often, or that touch sensitive areas, can stay behind a prompt.
The permission mode sets the baseline. In default mode, Claude Code Slash Commands that go beyond read operations ask before they act. In acceptEdits, file edits are auto-approved, which suits focused work where you trust the command set. In plan mode, Claude Code Slash Commands that would make changes are held to a read-only analysis, which is useful when you want a command to tell you what it would do rather than do it. Matching the mode to the task is how you keep Claude Code Slash Commands productive without letting them run unchecked.
A useful pattern is to run unfamiliar or newly-added Claude Code Slash Commands in plan mode first, read what they propose, and then switch to a more permissive mode once you trust them. This staged trust mirrors how you would review a new script before adding it to CI, and it applies cleanly to commands because they are ultimately the same kind of artifact. A command you have never run in plan mode is a command you should not yet auto-approve.
The /permissions command shows the current state of the allow-list and the active mode, which is the inspection step whenever a command behaves unexpectedly. If a command that should auto-approve is prompting, the allow-list is the first place to look; if a command that should be gated is running unchecked, the mode is the first place to look. Claude Code Slash Commands are predictable once you can see these two settings, which is why a quick /permissions check is part of diagnosing any command that feels off.
Pro Tips
- Use skills over legacy commands. Skills (
.claude/skills/) support directory structure, auto-invocation, and bundled reference files. Legacy.claude/commands/still works but skills are the current standard. - Always include trigger terms in your description. A description like “Fix lint errors” is too vague. Write “Run the linter, parse errors, and fix all reported issues. Use when the user mentions linting, code style, or ESLint.” This helps Claude auto-invoke when appropriate.
- Use
disable-model-invocation: truefor side-effect commands. Commands like/deployor/commitshould never be auto-triggered by Claude. This frontmatter field ensures only the user can invoke them. - Inject dynamic context with
!`command`. Rather than hardcoding state, use shell substitutions like!`git status`or!`git log --oneline -5`so Claude always sees current repository state. - Keep each command focused on one task. A
/commitcommand should only commit. If you also need pushing, create a separate/push-allcommand. Single-responsibility commands are easier to maintain and compose.
Hands-On Challenge: Build Your First Custom Slash Command
Task: Create a custom /lint-check slash command (as a skill) that runs your project’s linter, reports errors, and asks Claude to fix them automatically.
Steps
- Create the directory
.claude/skills/lint-check/in your project - Add a
SKILL.mdfile with YAML frontmatter (name: lint-check, a cleardescription, andallowed-tools: Bash(npm *)) - In the body, instruct Claude to: (a) run your linter with dynamic context via
!`npm run lint 2>&1`, (b) parse the output, (c) fix each error, and (d) re-run the linter to confirm a clean pass - Save the file and invoke
/lint-checkin a new Claude Code session - Verify Claude runs the linter, reads the output, and proposes fixes
Expected Outcome
Typing /lint-check should trigger Claude to run your linter, display the results, and offer to fix any reported issues, all without you pasting lint output manually.
Hint: Use the
!`command`syntax in your SKILL.md body to inject live shell output. For example:- Lint output: !`npm run lint 2>&1`. Claude sees the result, not the command.
Knowledge Check: Slash Commands in Claude Code
Test your understanding with these quiz questions. Try to answer each question before revealing the answer.
1. What are the four types of slash commands in Claude Code?
- Built-in, skills, plugin commands, MCP prompts
- Built-in, custom, hook commands, API prompts
- System, user, plugin, terminal commands
- Core, extension, macro, script commands
Correct Answer: A. Claude Code has built-in commands (like /help, /compact), skills (SKILL.md files), plugin commands (namespaced plugin-name:command), and MCP prompts (/mcp__server__prompt).
2. How do you pass all user-provided arguments to a skill?
- Use ${args}
- Use $ARGUMENTS
- Use $@
- Use $INPUT
Correct Answer: B. $ARGUMENTS captures all text after the command name. For positional args, use $0, $1, etc.
3. How do you inject live shell output into a skill’s prompt?
- Use $(command) syntax
- Use !`command` (backtick with !) syntax
- Use @shell:command syntax
- Use {command} syntax
Correct Answer: B. The !`command` syntax runs a shell command and injects its output into the skill prompt before Claude sees it.
4. What is the correct directory structure for a new custom skill called “deploy”?
- .claude/commands/deploy.md
- .claude/skills/deploy/SKILL.md
- .claude/skills/deploy.md
- .claude/deploy/SKILL.md
Correct Answer: B. Skills live in a directory under .claude/skills/ with a SKILL.md file inside. The directory name matches the command name.
5. How do plugin commands avoid name conflicts with user commands?
- They use a plugin-name:command-name namespace
- They have a special .plugin extension
- They are prefixed with p/
- They override user commands automatically
Correct Answer: A. Plugin commands use a namespace like pr-review:check-security to avoid conflicts with standalone user commands.
Test Your Knowledge
Additional Resources
| Resource | Type | Link |
|---|---|---|
| Official Interactive Mode Docs | Official Docs | code.claude.com/docs/en/interactive-mode |
| Official Skills Documentation | Official Docs | code.claude.com/docs/en/skills |
| CLI Reference | Official Docs | code.claude.com/docs/en/cli-reference |
| Claude Code Slash Commands | Anthropic Docs | docs.anthropic.com: slash-commands |
| Claude Code Changelog | GitHub | CHANGELOG.md |
Claude Code Slash Commands gives you a solid, repeatable workflow. Bookmark this Claude Code Slash Commands guide and revisit the steps whenever you need them.
Building a Custom Slash Command: A Step-by-Step Walkthrough
The fastest way to understand Claude Code Slash Commands is to build one. This walkthrough creates a /pr-prep command that stages changes, runs your test suite, and drafts a commit message, the kind of repetitive pre-ship routine that’s worth turning into a reusable command instead of retyping every time.
- Create the skill directory. Skills live under
.claude/skills/, one directory per command. Runmkdir -p .claude/skills/pr-prepinside your project root. - Write the SKILL.md file. Inside that directory, create
SKILL.mdwith YAML frontmatter describing the command and the tools it’s allowed to touch:--- name: pr-prep description: Stage changes, run tests, and draft a commit message before opening a PR. Use when the user mentions shipping, preparing a PR, or wrapping up a change. allowed-tools: Bash(git add:*), Bash(git status:*), Bash(npm test:*) argument-hint: [scope] --- - Inject live repository state. Below the frontmatter, use the
!`command`syntax so the command always sees current state instead of a stale snapshot:## Context - Git status: !`git status` - Test results: !`npm test 2>&1` ## Task Stage the relevant files, and if $ARGUMENTS was provided, scope the commit to that area. Draft a conventional-commit message summarizing the change. - Pass arguments for reuse.
$ARGUMENTScaptures whatever text follows the command name, so/pr-prep auth modulescopes the routine to a specific area without editing the file. - Test it in a fresh session. Start a new Claude Code session in the project, type
/pr-prep, and confirm it appears in the menu. Claude Code Slash Commands built as skills are picked up automatically, no restart or registration step required. - Restrict side effects deliberately. Because
allowed-toolsonly grantsgit add,git status, andnpm test, the command physically cannot rungit commitorgit pushon its own. You stay the one who approves the final commit.
If the command doesn’t appear in the / menu, the most common cause is a missing or malformed frontmatter block. SKILL.md requires the opening and closing --- delimiters, and a broken YAML value silently drops the command instead of raising an error. Run claude doctor to confirm your skills directory is being read correctly.
Once the command works, commit .claude/skills/pr-prep/ to git so the rest of the team gets the same shortcut. This is the general pattern behind every custom slash command: a directory, a frontmatter block that scopes tools and describes intent, and a body that mixes live shell context with instructions. The same shape used by the built-in /code-review and /security-review commands referenced earlier in this guide.
Claude Code Slash Commands: Common Mistakes to Avoid
Even experienced developers trip over the same issues when they start with Claude Code Slash Commands. Watch for these and you will save real debugging time.
- Forgetting that custom skills appear as slash commands, and re-typing the same long prompt instead of saving it.
- Hard-coding values that should be arguments, which makes a command far less reusable across tasks.
- Installing plugin commands without reading what they execute, which is a security and reliability risk.
- Letting command output dump entire files when a focused diff would be faster to review and safer to apply.
Claude Code Slash Commands: Best Practices
- Type / to discover available commands, skills, and plugin commands in context.
- Group reusable prompts into custom skills instead of pasting the same instructions repeatedly.
- Pass arguments to commands to make them dynamic rather than hard-coding values.
- Namespace plugin commands clearly so they never collide with built-ins.
- Document your custom commands in CLAUDE.md so teammates can reuse them.
Claude Code Slash Commands: Frequently Asked Questions
What’s the difference between a skill and a legacy command?
Both appear as Claude Code Slash Commands in the / menu, but skills (.claude/skills/) support directories, auto-invocation, and bundled reference files, while legacy commands (.claude/commands/) are single markdown files without those extras.
Can Claude invoke a slash command automatically?
Yes, if the description field describes when to use it and disable-model-invocation isn’t set to true. Side-effect commands like /deploy should set that field so only a human can trigger them.
How many arguments can a command accept?
As many as you pass after the command name. $ARGUMENTS captures everything as one string, or use $0, $1, and so on for positional access to individual arguments.
Do plugin slash commands ever collide with my own?
No. Plugin commands are namespaced as plugin-name:command, so a plugin’s /review command never overwrites a project’s own /review command.
Where should I store commands I want the whole team to use?
In .claude/skills/ or .claude/commands/ inside the project, then commit them to git. Anyone who clones the repository gets the same commands immediately.