Claude Code Commands provide fine-grained control over the assistant through built-in commands, custom skills, and plugins. This comprehensive guide covers context management tools like /context, /compact, and /branch, along with bundled skills including /code-review and /batch for handling large-scale changes across files.
The reference explains fast mode for quicker responses, keyboard shortcuts for efficient workflow, and advanced features like session persistence and goal-directed sessions. Users can create custom skills with dynamic context injection, shell output integration, and tool restrictions, enabling tailored automation while maintaining safety controls for deployment and other critical operations.
Claude Code Commands give you fine-grained control over the assistant. This reference covers built-in commands, custom skills, plugin commands, arguments, and dynamic context injection.
Claude Code Commands: What You’ll Learn
In this guide to Claude Code Commands, you’ll work through practical, hands-on steps with real examples. Claude Code Commands is explained from the ground up so you can apply it immediately in your own projects.
Now that you’ve got the fundamentals down, let’s explore the commands that experienced users rely on for context management, session tools, bundled skills, and time-saving keyboard shortcuts.
Context and Session Management
Every session runs within a context window. The /context command displays this as a visual grid: green means plenty of space, yellow indicates it’s filling up, and red signals near exhaustion. When your conversation grows too long, /compact shrinks it down. You can guide what gets preserved by passing instructions: /compact focus on the database migration plan.
/branch opens a parallel conversation from your current point, ideal for comparing two different approaches simultaneously. /rewind lets you go back to an earlier moment, great for when Claude took a wrong turn. It can even revert file changes, essentially acting as an undo for both your code and the conversation.
Long-running work is supported through session persistence. Use /rename my-feature to label a session with something memorable, then /resume my-feature to restore it with full context. The /export command writes a session to a file or clipboard for sharing or archiving.
/context
/compact focus on the auth refactor
/branch
/rename auth-refactor-v2
/export auth-refactor-v2.md
Bundled Skills
Claude Code includes several built-in skills that function like commands. They’re always ready to use without any installation.
/code-review (previously known as /simplify before v2.1.147) examines the current diff for correctness issues and reports findings without modifying files. Lower effort levels (/code-review low) return only high-confidence results, while high through max offer wider coverage. The ultra option runs a more thorough multi-agent review in the cloud. Starting in v2.1.154, /simplify became a standalone cleanup-only review that applies fixes without searching for bugs.
You can pass --comment to post findings as inline comments on your GitHub PR, or specify a path or PR reference for targeted reviews. /batch handles large-scale changes across many files by planning the work, using isolated git worktrees, and coordinating verification and follow-up. /loop 5m check deploy status runs a prompt on a repeating interval, handy for monitoring long operations. /proactive is just an alias for /loop, same behavior, but reads better when the goal is “keep watching and react.” The keyword ultracode triggers a dynamic workflow run (renamed from workflow in v2.1.160).
/debug turns on verbose logging for diagnosing Claude’s behavior or tool usage. /claude-api loads the Anthropic SDK reference for your project’s language, activating automatically when it detects imports from @anthropic-ai/sdk or the Python anthropic package.
/code-review
/code-review high --comment
/batch add JSDoc comments to all public functions in src/
/loop 2m check if the build finished
/debug
Fast Mode
Fast mode is a high-speed API setting for Opus that maintains the same model quality while delivering up to 2.5x faster responses at a higher per-token cost. It works with Opus 4.8 (default since v2.1.154), 4.7, and 4.6, though 4.6 support is deprecated and will be removed roughly 30 days after Opus 4.8 launches. Enable it with /fast or by setting fastMode: true in your user settings. When active, a ↯ icon shows up next to the prompt bar.
/fast # toggle on/off
/fast on # explicitly enable
/fast off # explicitly disable
Enabling fast mode automatically switches you to Opus (4.8 by default). Turning it off keeps you on Opus. Use /model to change models.
For custom LLM gateway users, set CLAUDE_CODE_ENABLE_GATEWAY_MODEL_DISCOVERY=1 to auto-populate the /model picker from your gateway’s /v1/models endpoint.
Fast mode and effort level are independent speed controls. /fast cuts latency without affecting quality. /effort low reduces thinking time, which may impact quality on complex tasks. Combine both for maximum speed on simple work:
/fast
/effort low
If you hit the fast mode rate limit, it gracefully falls back to standard Opus speed (the ↯ icon goes gray) and re-enables when the cooldown ends. The rate-limit pool is shared across Opus 4.8, 4.7, and 4.6. Fast mode requires usage credits enabled on your account. Manage them with /usage-credits (renamed from /extra-usage in v2.1.144), and is not available on Bedrock, Vertex AI, Foundry, Claude Platform on AWS, or the VS Code extension. Enterprise admins can control availability via managed settings.
Keyboard Shortcuts and Power Features
Shift+Tab cycles through permission modes: default, acceptEdits, plan, and optional modes like auto or bypassPermissions if enabled. This is the quickest way to enter plan mode for complex work and return afterward.
Option+T (macOS) or Alt+T toggles extended thinking, where Claude spends more time reasoning before answering. Use /effort to set reasoning depth: auto, low, medium, high, xhigh, or max where supported. max applies only to the current session. Ctrl+O enters verbose mode to watch tool calls and thinking steps unfold in real time.
/btw your question lets you ask a side question without adding it to the conversation history, perfect for checking a fact or syntax without cluttering context. Ctrl+B backgrounds running bash commands and agents, so you can give Claude new instructions while they keep working. To kill all background agents, use Ctrl+X Ctrl+K.
Ctrl+U wipes the entire input buffer, and Ctrl+Y restores what you just cleared, useful when you’ve typed a long prompt and want to start fresh without losing it. Ctrl+L forces a full screen redraw on top of clearing the prompt input, helpful when terminal output gets garbled. In the transcript viewer footer, [ dumps the transcript to scrollback and v opens it in your $EDITOR.
The /diff command opens an interactive diff viewer for uncommitted changes, far more readable than raw git output when reviewing Claude’s work before committing. /insights produces a session analysis report with statistics on accomplishments.
# Toggle to plan mode, then back
Shift+Tab
Shift+Tab

/effort high
/btw what's the difference between async and defer on script tags?
Vim Visual Mode
Vim enthusiasts get visual selection inside the input editor. Press v for character-wise selection or V for line-wise selection. In visual mode, navigation keys (h, j, k, l, w, e, b, f, F, t, T) extend the selection. Operators include: d/x to delete, y to yank, c/s to change, p to paste from register, r{char} to replace each character, ~/u/U for case toggling, >/< for indent/dedent, J to join lines, and o to swap cursor and anchor. Text objects like iw, aw, i", a", i(, a( are all supported. Block-wise visual mode (Ctrl+V) is not available.
Reading Huge Files: Partial View
The Read tool now returns a truncated first page with a PARTIAL view notice instead of throwing an error when a file is too large to read in one go. Previously, asking Claude to read a 500 KB JSON dump or a generated bundle would simply fail. Now it gets the first page plus a clear indicator that more content exists, and can call Read again with offset/limit to page through the rest. The token budget for a single read is controlled by CLAUDE_CODE_FILE_READ_MAX_OUTPUT_TOKENS. Increase it for sessions needing larger reads, decrease it for constrained environments.
In practice, no action is needed. When Claude encounters the partial-view notice, it knows to either narrow with grep first or paginate with offset. This behavior is especially important for migrations, large logs, and tools like /init that scan many files.
/usage: Unified Session Statistics
The /usage command shows a consolidated dashboard that replaces what /cost and /stats used to show separately: estimated cost, API and wall-clock duration, and lines added or removed. Since v2.1.149, it also provides per-category breakdowns showing what drives your limits: skills, subagents, plugins, and per-MCP-server cost. API users see detailed token statistics; subscribers see plan usage bars and activity. Both /cost and /stats still work as shortcuts to the relevant tab. Dollar figures are locally computed estimates. Check the Claude Console for authoritative billing.
/goal: Goal-Directed Sessions
The /goal command establishes a completion condition that Claude works toward across multiple turns. Once active, Claude continues autonomously until the goal is met. A live overlay displays elapsed time, turn count, and token usage for easy monitoring.
/goal migrate all API endpoints from REST to GraphQL
/goal all tests pass and coverage is above 80%
Goals pair nicely with /effort high for complex multi-step tasks. To limit how many turns Claude will take, set CLAUDE_CODE_MAX_TURNS as an environment variable:
export CLAUDE_CODE_MAX_TURNS=50Session Recap
When you return to the terminal after stepping away, Claude Code shows a one-line recap of what happened while you were gone. The recap generates in the background once at least three minutes have passed since the last completed turn and the terminal is unfocused, so it’s ready when you switch back. Recaps appear only after the session has at least three turns, and never twice in a row.
Run /recap to generate a summary on demand. To disable automatic recaps, open /config and turn off Session recap. Session recap is on by default for every plan and provider, and is always skipped in non-interactive mode.
Command History and Reverse Search
Claude Code keeps input history per working directory. Submitting the same prompt twice in a row records just one entry, so pressing Up steps to the previous distinct prompt. History resets when you run /clear, though the previous session’s conversation is preserved for /resume.
Press Ctrl+R to interactively search through command history. Type a query to search, press Ctrl+R again to cycle through older matches. Search defaults to prompts from all projects. Press Ctrl+S to cycle scope through current session, current project, and all projects. Use Tab or Esc to accept and keep editing, Enter to accept and execute immediately, or Ctrl+C to cancel.
Ctrl+R → type "migration" → Ctrl+R (older matches) → Tab (accept)Custom Themes
The /theme command allows creating and switching between named color themes. Themes are stored as JSON files in ~/.claude/themes/ and can be hand-edited. Plugins can also contribute themes via a themes/ directory in the plugin bundle.
Output Styles
Output styles change how Claude responds without affecting what it knows. They modify the system prompt to set role, tone, and format. Four built-in styles exist: Default (standard software engineering assistant), Proactive (executes immediately, makes reasonable assumptions instead of pausing, stronger autonomous guidance than auto mode, works independently of permission mode), Explanatory (adds educational “Insights” between coding steps), and Learning (collaborative mode where Claude marks strategic pieces with TODO(human) for you to implement).
Switch styles via /config → Output style. The selection is saved to .claude/settings.local.json. Changes take effect after /clear or a new session since output style is part of the system prompt.
Custom output styles are Markdown files with frontmatter. Save them in ~/.claude/output-styles/ (user), .claude/output-styles/ (project), or the managed settings directory (policy). The filename becomes the style name unless you set name: in frontmatter. Set keep-coding-instructions: true to retain Claude Code’s built-in software engineering instructions alongside your custom ones. Leave it out when Claude isn’t doing software engineering at all, like a writing assistant or data analyst:
---
name: Diagrams first
description: Lead every explanation with a diagram
keep-coding-instructions: true
---

When explaining code, architecture, or data flow, start with a Mermaid diagram showing the structure, then explain in prose.
Plugins can ship output styles in an output-styles/ directory, and plugin styles can set force-for-plugin: true to apply automatically when the plugin is enabled.
Real-World Command Examples
Example 1: Skill with Dynamic Arguments
Skills accept arguments via $ARGUMENTS for all input, or $0, $1 for positional parameters:
---
name: deploy
description: Deploy the application to staging or production
---
# Deploy Skill

Arguments provided: $ARGUMENTS

Target environment: $0

# Claude will execute the deployment based on the target environment.
Example 2: Shell Injection in a Command
Inject live shell output into a command prompt using the ! syntax:
---
name: git-status-summary
description: Show current git status summary
---
Current branch and status:
!`git branch --show-current`

Recent commits:
!`git log --oneline -5`
Example 3: Skill with Tool Restrictions
Restrict which tools a skill can invoke using allowed-tools:
---
name: read-only-audit
description: Audit project structure in read-only mode
allowed-tools: [Read, Grep, Glob]
disable-model-invocation: false
---
# Read-Only Audit Skill

This skill can only read files and search - it cannot modify anything.
Command Discovery and the Help System
The command surface is large enough that discovery is a skill in itself. The /help command lists every available command, including the ones contributed by plugins, skills, and custom configurations, and it is the right first stop when you suspect a command exists for what you want to do. Browsing the help output occasionally – even when you do not need a specific command – builds a mental index that pays off the next time you face a task the commands can shortcut.
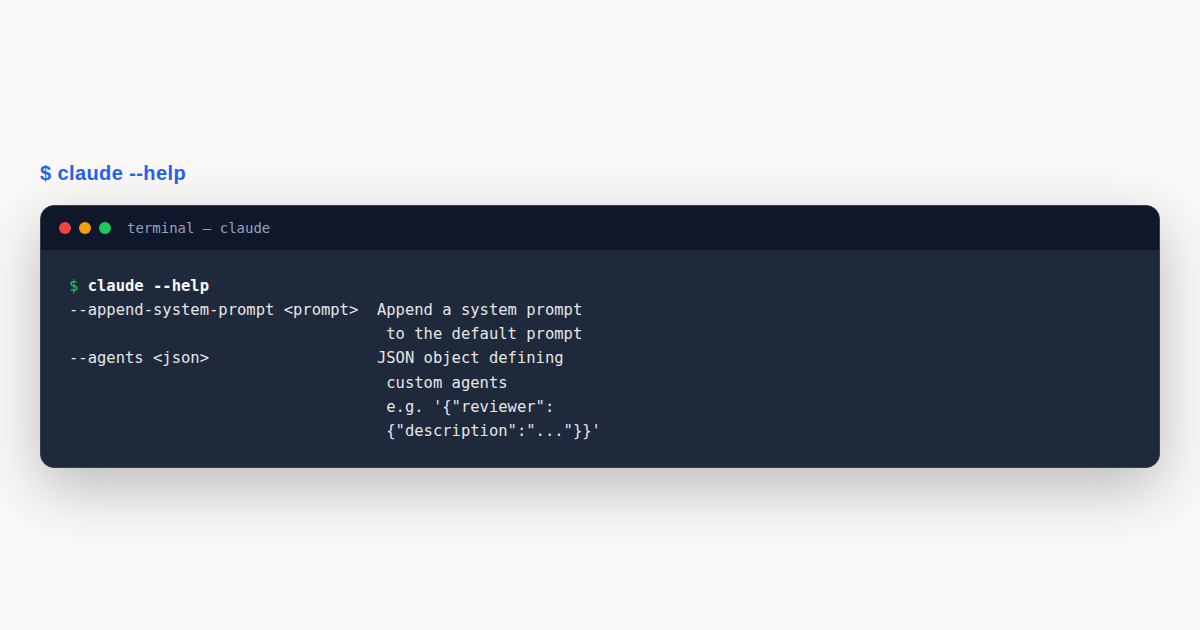
Many commands accept a --help or -h flag that prints their argument shape and a short description, which is faster than reading full documentation for a command you mostly remember. Commands that document their own arguments this way are usable without leaving the session; commands that do not force a context switch to a browser or a man page, which breaks flow. Treating self-documenting commands as the expected baseline, and filing or fixing any that are not, raises the quality of the whole command surface.
The help system also distinguishes built-in commands from contributed ones, which matters when something breaks. A contributed command that fails may be fixed by updating or removing its plugin; a built-in command that fails is more likely an environment or configuration issue. Knowing which is which, which the help output shows, routes the troubleshooting to the right place immediately rather than after a false start.
Command Composition Patterns
Single commands solve single problems; composed commands solve workflows. The composition patterns that recur are piping one command’s output into another’s input, sequencing commands so each builds on the previous result, and branching based on a command’s exit status. Commands that are designed to compose – emitting structured output, accepting structured input, returning clear exit codes – slot into pipelines naturally, while commands that emit only prose and return only “done” do not.
A productive composition habit is to chain a context-management command with a task command. Clearing or compacting context before a new task, then running the task command, then recording the cost produces a clean unit of work whose inputs and outputs are bounded. Commands chained this way turn a session into a sequence of well-defined transactions rather than an undifferentiated stream, which is easier to reason about and to audit.
Composition rewards commands with predictable output shapes. A command that returns JSON can be parsed by a downstream command or a wrapper script; a command that returns freeform prose cannot. Commands that emit structured output when given a flag – say, --output-format json – serve both the interactive user, who reads the prose form, and the pipeline, which consumes the structured form. Designing and preferring commands with this dual mode is what makes composition practical at scale.
Command Aliases and Customization
Aliases are the lightest form of command customization, and they pay back their setup cost almost immediately. A long command you run often – one with arguments you always pass – can be aliased to a short name, which saves typing and reduces the chance of a typo in the arguments. Aliases are especially valuable for commands whose full form is hard to remember, because the alias becomes the memorable handle and the underlying form is looked up once and then forgotten.
Beyond aliases, custom commands – defined in a configuration file or a plugin – let you encode a multi-step procedure as a single invocation. A custom command that runs your project’s review checklist, or that generates a branch with your team’s naming convention, removes a small but repeated piece of cognitive overhead. Commands that encode team conventions are the most valuable customizations, because every teammate benefits from the same shortcut.
The risk with aliases and custom commands is divergence between environments. An alias that exists on your machine but not a teammate’s produces a command that works for you and fails for them, which is confusing in a shared context. Checking aliases and custom commands into a shared configuration – so every teammate inherits the same set – keeps the command surface consistent across the team, which is the property that makes shared commands reliable.
Commands in Scripting and Automation
Commands are not only for interactive use; they are the building blocks of automation. A script that invokes commands in a fixed order, parses their structured output, and branches on the results is a portable automation that runs anywhere the session runs. Commands designed for automation – deterministic output, clear exit codes, no interactive prompts – compose into scripts cleanly; commands that pause for input or emit ambiguous output do not.
The print-mode invocation is the natural bridge between interactive commands and scripted automation. Running a command in print mode consumes the input, produces the output, and exits without opening an interactive session, which is exactly what a script needs. Commands that behave well in print mode – fast, deterministic, structured – are the ones worth wrapping in scripts; commands that only work interactively are limited to live use.
Error handling in scripted commands matters more than in interactive ones, because there is no human to notice a problem mid-run. A script should check each command’s exit status, capture its output for the log, and decide explicitly whether to continue, retry, or halt. Commands that return informative non-zero exit codes – distinguishing a transient failure from a permanent one – let the script respond appropriately, where a single generic failure code forces the script to guess.
Command Performance Characteristics
Commands vary widely in cost, and knowing the cost profile of each helps you choose well under pressure. A command that reads a local file is nearly free; a command that calls an external API costs network latency plus tokens; a command that scans a large repository costs both time and a sizable context addition. Commands that feel similar interactively can differ by orders of magnitude in what they consume, and the difference only shows up in the cost report.
The context cost of a command is the often-hidden component. A command that dumps a large result into the session adds to the context window, which affects every subsequent interaction until the context is cleared or compacted. Commands that summarize their results – returning a short structured answer rather than the full raw output – keep the context lean, which keeps later reasoning sharp. Prefer commands that summarize, and reach for the verbose form only when the summary is insufficient.
Caching is the performance lever for commands that call out to slow or rate-limited services. A command that caches its result for a sensible window – long enough to avoid redundant calls, short enough to stay fresh – performs far better under repeated invocation than one that re-fetches every time. Commands that expose their cache window, and let the user bust the cache when needed, give the best of both: speed by default, freshness on demand.
Command Security Implications
Commands that run other commands – shell-out commands, exec wrappers, anything that takes a user string and passes it to a shell – are the highest-risk surface in the command set, because a crafted input can inject a shell instruction. Commands that avoid shell interpretation by passing arguments as separate array elements, rather than concatenating them into a shell string, close this vector entirely. Treating shell-safe argument passing as a hard requirement, not a best effort, is the baseline for any command that accepts external input.
Commands that modify files have a smaller but real risk: a command run against the wrong file, or the wrong branch, can do damage that has to be undone. Confirmation prompts for destructive commands – delete, overwrite, force – are a cheap defense that catches the most common mistake, which is running the right command against the wrong target. Commands that make destructive operations easy to do by accident are a liability; ones that gate them deliberately are trustworthy.
Network commands carry the risk of leaking data or fetching adversarial content. A command that posts session content to an external service should declare what it sends and where; a command that fetches external content should treat that content as untrusted data. Commands with clear data-flow declarations let the user reason about the risk; commands that move data opaquely do not, and the opaque ones are where surprises happen.
Command History and Recall
Command history is the underrated productivity feature of any command-driven interface, and using it well is a skill. The basics – reverse search to find a command by a fragment of its name, recall of the last command with a single keystroke – save enough time over a day to matter. The advanced move is to treat history as a personal script library: the commands you ran last week are often the commands you need today, and a searchable history turns “how did I do this before” into a one-keystroke answer.
History persistence across sessions compounds the value. A history that survives session restarts lets you recall a command from yesterday’s work, which is when the payoff is largest – the command that solved a fiddly problem once is the one you most want to find again. Configuring history to persist, and to a location that is not accidentally cleared, preserves the institutional knowledge encoded in the commands you have run.
History has a privacy dimension. A history that records commands containing secrets – an API key passed inline, a password in a connection string – becomes a secrets store that is protected like any other secrets store, which is to say more carefully than a plain text file usually is. Commands that accept secrets should prefer reading them from environment variables or files over inline arguments, which keeps the history clean and the secrets out of it.
Team Command Standardization
A team that standardizes on a shared command set gets more value per command than a team where everyone uses a different subset. Shared commands mean a question like “which command did you run to triage that?” has a single answer the whole team recognizes, which makes collaboration faster and onboarding smoother. Standardization does not mean forbidding customization; it means agreeing on a common core that everyone knows.
The common core is built from the commands the team uses most, configured identically across everyone’s setup. A reviewed set of aliases, a shared custom command or two for team-specific workflows, and a documented preference for one command over another where two overlap – these are the artifacts of a standardized command surface. Checking them into a shared configuration, and updating them through review rather than individual edits, keeps the core coherent as it evolves.
Onboarding is where standardization pays back most visibly. A new teammate who inherits the team’s command set starts productive on day one, because the commands encode the team’s actual workflows – how they triage, how they review, how they release. Documenting each command’s purpose in a short index, alongside the configuration, turns the command set into a readable introduction to how the team works, which is a far better onboarding artifact than a generic tool list.
Pro Tips
- Use clear, action-oriented command names:
/optimize,/pr,/commitare instantly understandable. Avoid vague names like/helperor/misc. - Always include a description with trigger conditions: this helps Claude know when to auto-invoke a skill. Write descriptions like “Use when [specific scenario].”
- Use
disable-model-invocation: truefor side-effect commands: deploy, commit, push, and other destructive commands should only run when explicitly invoked by you. - Leverage
!shell substitutions for dynamic context: inject git status, branch info, or file contents so Claude has current state without manual copy-paste. - Keep commands focused on a single task: one command equals one responsibility. Do not build a “do everything” command. Compose multiple focused commands instead.
Hands-On Challenge
Put your slash command knowledge into practice with this real-world exercise.
Task: Build a Custom Deployment Command
Create a custom slash command that automates a safe deployment workflow using the skill format.
Steps
- Create a new skill directory:
.claude/skills/deploy/ - Create a
SKILL.mdfile with frontmatter includingdisable-model-invocation: true(so Claude will not auto-deploy). - Add dynamic context using
!shell substitutions to show the current git branch, recent commits, and git status. - Include safety checks: verify branch is
main, ensure no uncommitted changes, and run tests before deploying. - Use
allowed-toolsto restrict the command to onlyBash(npm *)andBash(git *). - Test the command with
/deployand verify it refuses to run on non-main branches.
Expected Outcome
Running /deploy should display current git context, run the test suite, build the project, and only proceed to deploy if all checks pass. On a feature branch, it should stop and warn you.
Hint
Use
disable-model-invocation: truein your frontmatter for any command with side effects. Check the/push-alland/setup-ci-cdexamples for patterns on safety checks and dynamic context injection.
Knowledge Check
Test your understanding of Claude Code slash commands with these questions:
- What are the four types of slash commands in Claude Code?
A) Built-in, skills, plugin commands, MCP prompts | B) Built-in, custom, hook commands, API prompts | C) System, user, plugin, terminal commands | D) Core, extension, macro, script commands
Answer: A. Claude Code has built-in commands (like /help, /compact), skills (SKILL.md files), plugin commands (namespaced plugin-name:command), and MCP prompts (/mcp__server__prompt). - How do you pass all user-provided arguments to a skill?
A) Use${args}| B) Use$ARGUMENTS| C) Use$@| D) Use$INPUT
Answer: B.$ARGUMENTScaptures all text after the command name. For positional args, use$0,$1, etc. - When both a skill and a legacy command exist with the same name, which takes priority?
A) The legacy command | B) The skill | C) Whichever was created first | D) Claude asks the user to choose
Answer: B. Skills take precedence over legacy commands with the same name. The skill system supersedes the older command system. - How do you inject live shell output into a skill’s prompt?
A) Use$(command)syntax | B) Use!`command`syntax | C) Use@shell:commandsyntax | D) Use{command}syntax
Answer: B. The!`command`syntax runs a shell command and injects its output into the skill prompt before Claude sees it. - What does
disable-model-invocation: truedo in a skill’s frontmatter?
A) Prevents the skill from running entirely | B) Allows only the user to invoke it (Claude cannot auto-invoke) | C) Hides it from the /help menu | D) Disables the skill’s AI processing
Answer: B.disable-model-invocation: truemeans only the user can trigger the command via /command-name. Claude will never auto-invoke it, useful for skills with side effects like deployments.
Test Your Knowledge
Additional Resources
| Resource | Description |
|---|---|
| Official Interactive Mode Documentation | Built-in commands reference with full details |
| Official Skills Documentation | Complete skills reference (custom commands are now skills) |
| CLI Reference | Command-line options and flags |
| Slash Commands Guide | Official slash commands documentation |
| Claude Code Changelog | Track new commands and feature updates |
Claude Code Commands gives you a solid, repeatable workflow. Bookmark this Claude Code Commands guide and revisit the steps whenever you need them.
A Worked Example: Building a Custom Deploy Command
Reading about commands is one thing; building one clears up how the pieces fit together. Walk through turning a repeated manual chore, “run tests, bump the changelog, tag a release”, into a reusable skill-based command that shows up alongside the built-ins the moment you type /.
Start by creating the skill file. Custom commands live as Markdown files with YAML frontmatter, either in a project’s .claude/skills/ directory (shared with the team via version control) or your personal ~/.claude/skills/ directory (available across every project). Create .claude/skills/deploy.md:
---
name: deploy
description: Run the test suite, bump the changelog, and tag a release for the given version
argument-hint: [version]
allowed-tools: Bash(npm test:*), Bash(git tag:*), Bash(git push:*), Edit
disable-model-invocation: true
---

Run the full test suite. If it passes, update CHANGELOG.md with a new
entry for version $ARGUMENTS, commit the change, then create and push
a git tag for v$ARGUMENTS.
Two lines do most of the work here. allowed-tools restricts this command to exactly the shell operations and file edits it needs. Claude can’t suddenly decide to rm -rf something while running /deploy, because tools outside that allowlist simply aren’t available in this context. disable-model-invocation: true is the more important line for a command like this one: it stops Claude from silently deciding to run /deploy on its own initiative mid-conversation. A command that tags and pushes a release should only ever fire when a human types it.
Now test it. Type /deploy 2.4.0 in a project that has this skill installed, and Claude expands $ARGUMENTS to 2.4.0 before running the prompt. For commands that take multiple distinct values, positional arguments are clearer than one blob of text. A command tagging both a version and an environment could read $0 and $1 instead of parsing $ARGUMENTS by hand:
/deploy staging 2.4.0
# inside deploy.md: "Deploy $0 using version $1"
# $0 -> staging, $1 -> 2.4.0
To pull in live repository state rather than relying on stale instructions, add a shell-injection line above the prompt body. A leading ! followed by a backtick-wrapped command runs that command and splices its output into context before Claude sees the rest of the file:
---
name: deploy
description: Run tests, bump the changelog, and tag a release
allowed-tools: Bash(npm test:*), Bash(git tag:*), Bash(git log:*)
disable-model-invocation: true
---

Recent commits: !`git log --oneline -10`

Run the full test suite, then update CHANGELOG.md for version $ARGUMENTS
based on the commits above, and tag the release.
This is where a custom command diverges from a bundled one like /code-review: /code-review ships with the product, already tuned against a broad description so Claude reaches for it automatically when you ask for review-style feedback. /deploy is scoped to your repository, your changelog format, and your release process. It only exists because you wrote it, and disable-model-invocation keeps it from ever running except by explicit, deliberate invocation. That distinction (auto-discoverable general-purpose skill versus locked-down project-specific command) is the core design decision every custom command author has to make.
Claude Code Commands: Common Mistakes to Avoid
Most problems with custom Claude Code commands trace back to a handful of recurring habits. Here are the ones worth checking before you ship a command to your whole team.
- Skipping
disable-model-invocationon commands with side effects. Any command that writes files, pushes to git, or calls an external API should setdisable-model-invocation: true. Without it, Claude may decide on its own that the moment “matches” your command’s description and invoke a deploy, a tag, or a destructive shell step without being explicitly asked. - Writing a vague
descriptionfield and expecting auto-invocation to work. Claude decides whether to reach for a skill based on how closely its description matches the current request. A description like “helps with stuff” never triggers reliably; a description like “reviews a diff for security issues and code smells before merge” does. - Not realizing a skill shadows a same-named legacy command. If both
.claude/commands/review.md(the older, flat command format) and a skill namedreviewexist, Claude resolves to one of them, and it’s easy to edit the file you assume is active while the other one is actually answering/review. Consolidate onto skills and delete stale legacy command files rather than maintaining both. - Confusing
$ARGUMENTSwith positional$0/$1.$ARGUMENTScaptures everything typed after the command name as one string, which is fine for a single free-form value but awkward once a command needs two or three distinct inputs. Reaching for$0,$1, etc. instead makes multi-value commands (like the staging/version example above) far less brittle to parse.
Claude Code Commands: Best Practices
- Lean on built-in commands before writing custom ones; many workflows are already covered.
- Turn frequently repeated instructions into a custom skill command.
- Use arguments and dynamic context injection so a single command adapts to each run.
- Keep command output focused; ask for diffs rather than whole files when iterating.
- Audit plugin commands you install so you understand what they execute.
Claude Code Commands: Frequently Asked Questions
What’s the difference between /code-review and /simplify?
/code-review is a bundled skill that audits a diff for correctness bugs, security issues, and reuse problems; /simplify targets the same changed code purely for clarity and efficiency and does not hunt for bugs. Run /code-review when you need to catch mistakes, and /simplify once the logic is already correct and you want cleaner code.
How does Fast Mode differ from setting an effort level?
Fast Mode (triggered with /fast) switches the session to a lighter, quicker-responding configuration for straightforward commands where latency matters more than depth. /effort instead tunes how much reasoning the model applies within its current mode. You can raise effort for a hard debugging command without leaving Fast Mode, or lower it inside a normal session to speed up routine commands.
If a skill and a legacy .claude/commands file share a name, which one runs?
Claude Code resolves a single command per name, so a skill with the same name as an older .claude/commands/*.md file effectively shadows it. Only one definition actually answers when you type the command. This is a common source of “I edited the file but nothing changed” confusion; check which format is active before debugging further.
Why does my custom command sometimes run without me typing it?
That’s model-invocation: Claude can choose to run a skill-based command on its own if its description matches your request closely enough. Any command with side effects (deploys, tags, destructive shell steps) should set disable-model-invocation: true in its frontmatter so it only ever fires on an explicit /name invocation.
Do Output Styles change how commands behave?
Output Styles (Default, Proactive, Explanatory, Learning, or a custom style defined with its own frontmatter) change how Claude narrates and formats its responses, not which commands are available. A command like /deploy runs the same underlying steps regardless of style. The style only affects the tone and detail of what Claude says while running your commands.